本教程为您提供有关如何在服务器端使用ASP.NET Core 2创建Gantt的分步说明。为了组织与数据库的通信,使用了实体框架核心。该应用程序是在Visual Studio 2017的帮助下构建的。
本教程为您提供有关如何在服务器端使用ASP.NET Core 2创建Gantt的分步说明。为了组织与数据库的通信,使用了实体框架核心。该应用程序是在Visual Studio 2017的帮助下构建的。
咨询客服
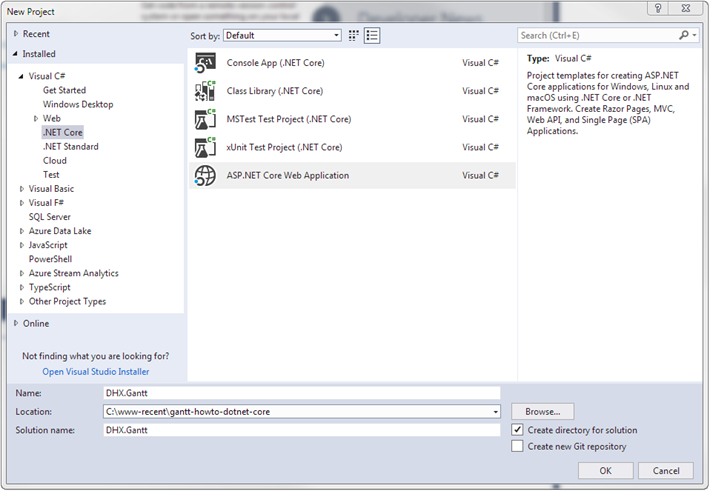
步骤1.创建一个项目
启动Visual Studio 2017并创建一个新项目。打开文件菜单,然后选择:新建->项目。
接下来,选择“ ASP.NET Core Web应用程序”,并将其命名为DHX.Gantt。

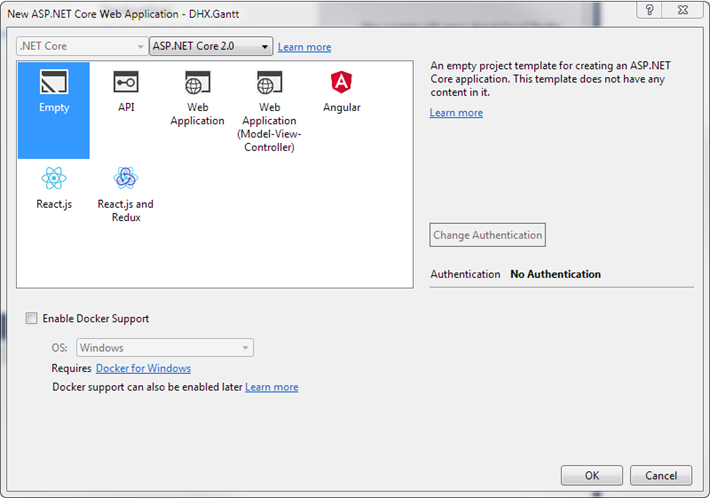
选择一个空模板。
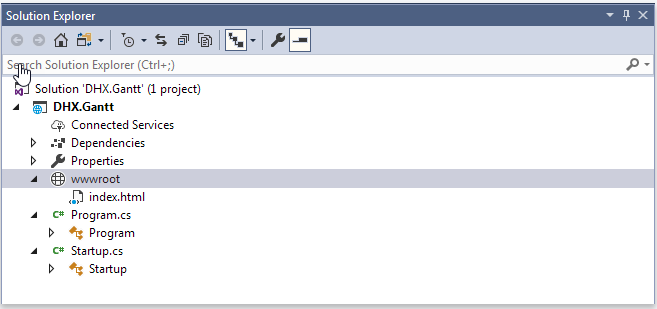
因此,您已经创建了一个项目,可以继续为Gantt添加标记和脚本。
第2步。添加甘特标记和JS
转到wwwroot并创建一个index.html文件。
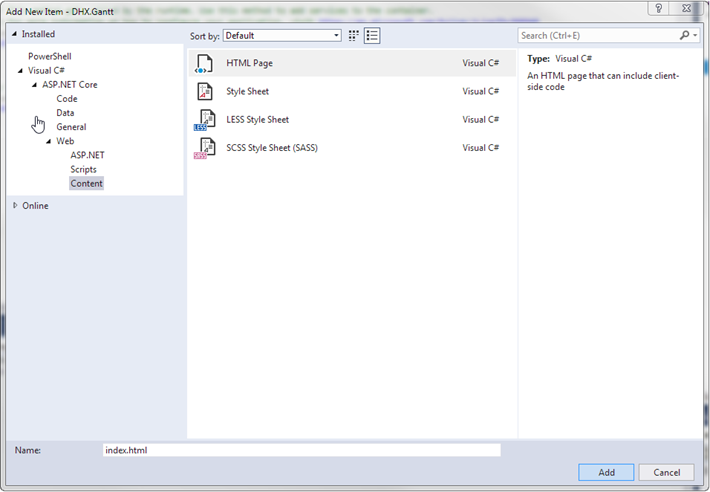
在新创建的文件中,为甘特图制作一个简单的页面。
请注意,在此演示中,从CDN添加了甘特文件。如果您拥有该组件的专业版,则需要手动将gantt文件添加到您的项目中。
index.html
<!DOCTYPE html><html><head> <meta name="viewport" content="width=device-width" /> <title>Index</title> <link href="https://cdn.dhtmlx.com/gantt/edge/dhtmlxgantt.css" rel="stylesheet" type="text/css" /> <script src="https://cdn.dhtmlx.com/gantt/edge/dhtmlxgantt.js"></script> <script> document.addEventListener("DOMContentLoaded", function(event) { // specifying the date format gantt.config.date_format = "%Y-%m-%d %H:%i"; // initializing gantt gantt.init("gantt_here"); // initiating data loading gantt.load("/api/data"); // initializing dataProcessor var dp = new gantt.dataProcessor("/api/"); // and attaching it to gantt dp.init(gantt); // setting the REST mode for dataProcessor dp.setTransactionMode("REST"); }); </script></head><body> <div id="gantt_here" style="width: 100%; height: 100vh;"></div></body></html>
加载页面时,除了初始化甘特图 外,还会立即调用数据加载并进行 dataProcessor设置,因此用户对甘特图所做的所有更改都将保存到后端。后端尚未实现,因此以后会更有意义。
接下来转到Startup.cs,并告诉应用程序使用index.html页面。为此,您需要配置该应用程序以提供该wwwroot文件夹中的静态文件。它在实现Configure方法调用的app.UseStaticFiles()方法。您可以在此处找到更多详细信息。
我们还需要将所需的中间件添加到Startup.cs中,Configure()方法是用突出显示的两行代码替换方法中的“ Hello world”存根:
Startup.cs
using Microsoft.AspNetCore.Builder;using Microsoft.AspNetCore.Hosting;using Microsoft.AspNetCore.Http;using Microsoft.Extensions.DependencyInjection;namespace DHX.Gantt{ public class Startup { // This method gets called by the runtime. // Use this method to add services to the container. // For more information on how to configure your application, // visit https://go.microsoft.com/fwlink/inkID=398940 public void ConfigureServices(IServiceCollection services) { } // This method gets called by the runtime. // Use this method to configure the HTTP request pipeline. public void Configure(IApplicationBuilder app, IHostingEnvironment env) { if (env.IsDevelopment()) { app.UseDeveloperExceptionPage(); } app.UseDefaultFiles(); app.UseStaticFiles(); } }}
添加的2个中间件是:
-
app.UseDefaultFiles()–允许提供默认文件。它将在wwwroot文件夹中搜索以下文件:
- index.html
- index.htm
- default.html
- default.htm因此,您可以选择其中的任何一个,而在本教程中使用“ index.html”。 UseDefaultFiles()只是一个实际上不提供文件服务的URL重写器。为此,您还需要添加UseStaticFiles()文件。
- app.UseStaticFiles()–负责提供wwwroot文件夹中存在的所有静态文件。
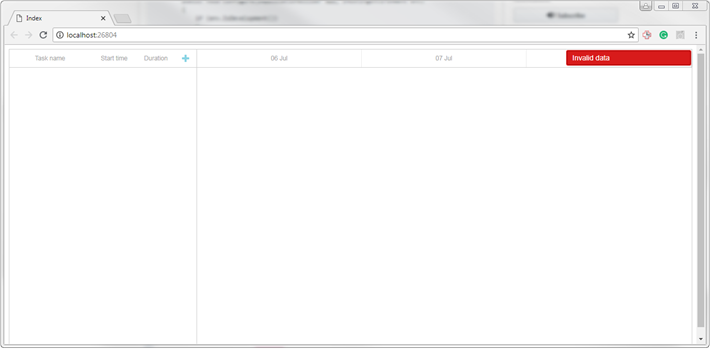
完成后,在运行应用程序时页面上将出现一个空的甘特图。请注意,由于gantt.load()被调用,因此显示了右上角的“无效数据”标签,因为仍然没有适当的后端来提供数据。实施控制器后,甘特将能够显示任务和链接。
现在基本部分已经完成,现在是实现后端的时候了。让我们从实现模型类开始,然后继续到WebAPI控制器。
未完待续……下一章继续讲解如何创建模型和数据库!、
咨询客服
标签:
声明:本站部分文章及图片源自用户投稿,如本站任何资料有侵权请您尽早请联系jinwei@zod.com.cn进行处理,非常感谢!