WebOffice正式版
本教程介绍了WebOffice打开一个服务器文档,一共分为四个步骤:
- WebOffice控件下载与注册
- 生成两个html文档
- 设计启动页(index.html)
四、设计WebOffice控件加载页(edit.html)
1、为了让edit.html能正确加载WebOffice,执行如下操作:
编写html结构代码:
<html><head><title></title></head><body></body></html>
2、引入WebOffice对象
请将如下代码复制到edit.html代码body标签之后:
<script language="javascript">if (!!window.ActiveXObject || "ActiveXObject" in window){document.write('<object classid="clsid:FF09E4FA-BFAA-486E-ACB4-86EB0AE875D5" codebase="WebOffice.ocx#Version=2019,1,7,3" id="WebOffice" width="900" height="500" >');document.write('</object>');}else{document.write('<object id="WebOffice" CLSID="{FF09E4FA-BFAA-486E-ACB4-86EB0AE875D5}" TYPE="application/x-itst-activex" width=100% height=900></object>');}</script>
完成后,如下
<html><head><title></title></head><body><script language="javascript">if (!!window.ActiveXObject || "ActiveXObject" in window){document.write('<object classid="clsid:FF09E4FA-BFAA-486E-ACB4-86EB0AE875D5" codebase="WebOffice.ocx#Version=2019,1,7,3" id="WebOffice" width="900" height="500" >');document.write('</object>');}else{document.write('<object id="WebOffice" CLSID="{FF09E4FA-BFAA-486E-ACB4-86EB0AE875D5}" TYPE="application/x-itst-activex" width=100% height=900></object>');}</script></body></html>
3、设计按钮
在edit.html代码Body标签之后 <script language=”javascript”>标签之前加入如下代码:
<div><input type=button onclick="" value="打开"></div>
执行完成后,edit.html的代码如下:
<html><head><title></title></head><body><div><input type=button onclick="" value="打开"></div><script language="javascript">if (!!window.ActiveXObject || "ActiveXObject" in window){document.write('<object classid="clsid:FF09E4FA-BFAA-486E-ACB4-86EB0AE875D5" codebase="WebOffice.ocx#Version=2019,1,7,3" id="WebOffice" width="900" height="500" >');document.write('</object>');}else{document.write('<object id="WebOffice" CLSID="{FF09E4FA-BFAA-486E-ACB4-86EB0AE875D5}" TYPE="application/x-itst-activex" width=100% height=900></object>');}</script></body></html>
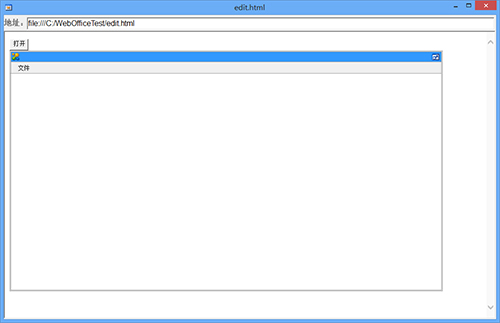
执行后的效果如图:

4、调用WebOffice对象Open()方法打开文档
为“打开”按扭增加点击触发JS函数:
①找到“打开”按扭代码的onclick属性,在双引 里写入如下代码:
OpenDoc();
②增加Open()函数的的函数实现
在edit.html的</head>和<body>标签之前加入如下代码:
<script language="javascript">function OpenDoc(){//取得WebOffice对象var WebOffice=document.getElementById("WebOffice");//通过对象WebOffice的Open方法打开个一个服务器文档//此处服务器文档地址为:http://www.officectrl.com/officecs/temp/file1.docWebOffice.Open("http://www.officectrl.com/officecs/temp/file1.doc",false,"Word.Document");}</script>
<html><head><title></title></head><script language="javascript">function OpenDoc(){//取得WebOffice对象var WebOffice=document.getElementById("WebOffice");//通过对象WebOffice的Open方法打开个一个服务器文档//此处服务器文档地址为:http://www.officectrl.com/officecs/temp/file1.docWebOffice.Open("http://www.officectrl.com/officecs/temp/file1.doc",false,"Word.Document");}</script><body><div><input type=button onclick="OpenDoc();" value="打开"></div><script language="javascript">if (!!window.ActiveXObject || "ActiveXObject" in window){document.write('<object classid="clsid:FF09E4FA-BFAA-486E-ACB4-86EB0AE875D5" codebase="WebOffice.ocx#Version=2019,1,7,3" id="WebOffice" width="900" height="500" >');document.write('</object>');}else{document.write('<object id="WebOffice" CLSID="{FF09E4FA-BFAA-486E-ACB4-86EB0AE875D5}" TYPE="application/x-itst-activex" width=100% height=900></object>');}</script></body></html>
5、运行测试
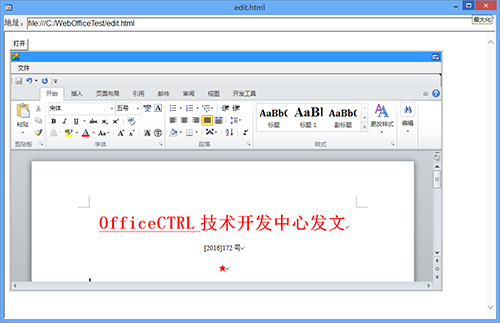
用浏览器打开index.html后,点击查看链接,弹出启动应用程序是否同意对话框选择“同意”后,出现智能窗,在智能窗 页点击“打开”按钮,如果你此时互联 联通,则可以正确打开 www.officectrl.com服务器上的文档。效果如下:
本示例,如果用户不使用互联 文档,用户可以设置自已服务器地址如:http://localhost/test.doc
将edit.html用地址http://localhost/test.doc 修改后代码如下:
<html><head><title></title></head><script language="javascript">function OpenDoc(){//取得WebOffice对象var WebOffice=document.getElementById("WebOffice");//通过对象WebOffice的Open方法打开个一个服务器文档//此处服务器文档地址为:http://www.officectrl.com/officecs/temp/file1.docWebOffice.Open("http://localhost/test.doc",false,"Word.Document");}</script><body><div><input type=button onclick="OpenDoc();" value="打开"></div><script language="javascript">if (!!window.ActiveXObject || "ActiveXObject" in window){document.write('<object classid="clsid:FF09E4FA-BFAA-486E-ACB4-86EB0AE875D5" codebase="WebOffice.ocx#Version=2019,1,7,3" id="WebOffice" width="900" height="500" >');document.write('</object>');}else{document.write('<object id="WebOffice" CLSID="{FF09E4FA-BFAA-486E-ACB4-86EB0AE875D5}" TYPE="application/x-itst-activex" width=100% height=900></object>');}</script></body></html>
如果用户http://localhost/test.doc地址是一个正确WORD文档的URL地址,则可以正确查看结果。
注意:WebOffice的运行不一定需要使用互联 络或局域 环境,WebOffice完全可以在一台电脑上完成所有测试。因为WebOffice支持 络B/S结构、C/S结构的一层、多层或任意层的架构运行,也支持单机版、桌面端程序运行。WebOffice采用业界标准的COM组件设计。
本教程内容尚未完结,敬请期待后续内容!您可以下载WebOffice试用版免费体验~或者点击下方链接,查看本教程示例~
相关内容推荐:
WebOffice入门教程一:Hello Word!
WebOffice入门教程:Hello World!(一)打开服务器文档
想要购买WebOffice正版授权,或了解更多产品信息请点击【咨询在线客服】

标签:
声明:本站部分文章及图片源自用户投稿,如本站任何资料有侵权请您尽早请联系jinwei@zod.com.cn进行处理,非常感谢!