DevExpress Winforms Controls 内置140多个UI控件和库,完美构建流畅、美观且易于使用的应用程序,本教程主要为大家介绍如何实现UI自动化。
在针对Visual Studio 2019的发行说明中,Microsoft 宣布Coded UI测试的生命周期终止。
Microsoft建议将Appium with WinAppDriver 一起用于测试桌面和UWP应用,此消息引起广大用户的兴趣:DevExpress控件是否与Appium兼容过DevExpress团队的反复测试,答案是肯定的!使用Appium创建自动UI测试的方法如下。
1. 跳转到 https://github.com/Microsoft/WinAppDriver/releases然后下载两个APP,
- WinAppDriver – 允许您运行测试,需要安装。
- WinAppDriver UI Recorder – 允许您在运行时记录测试,不需要安装 – 将下载的存档解压到任何文件夹。
2. 在Windows中打开Developer Mode。
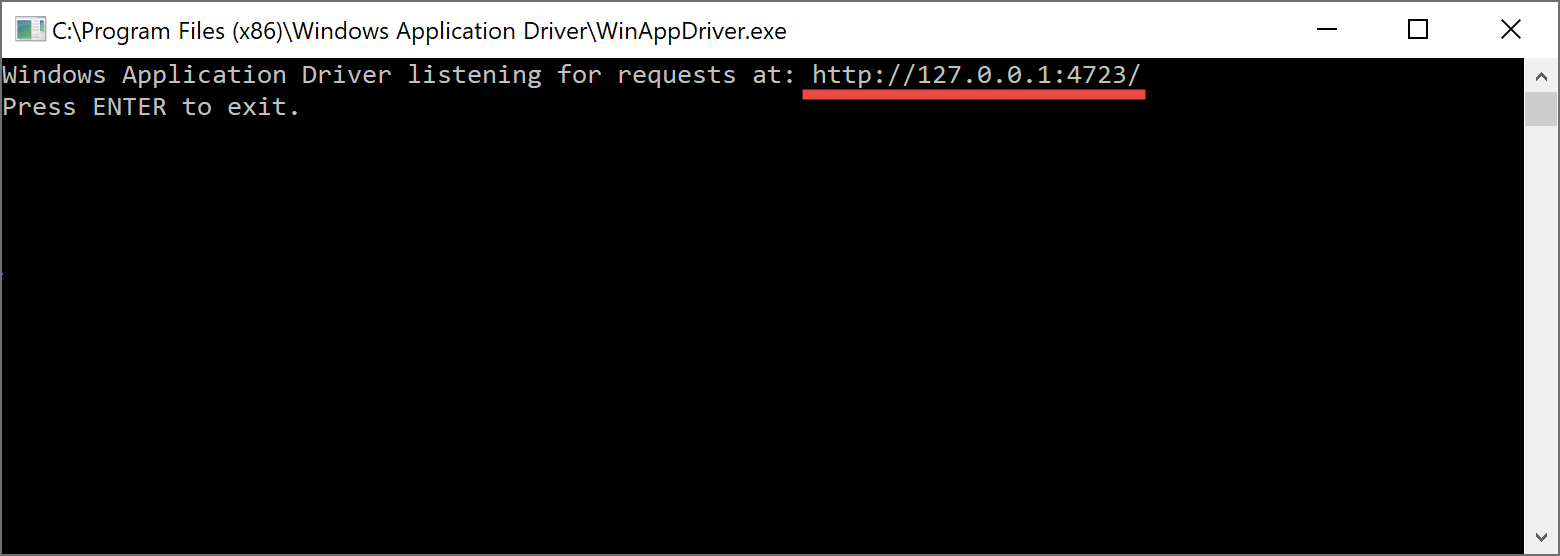
3. 以管理员身份运行WinAppDriver.exe并使其运行,请注意应用程序正在侦听的地址,稍后您将需要它。

4. 打开您要测试的Visual Studio解决方案,或创建一个新的示例解决方案。
5. 将新的单元测试项目添加到解决方案。
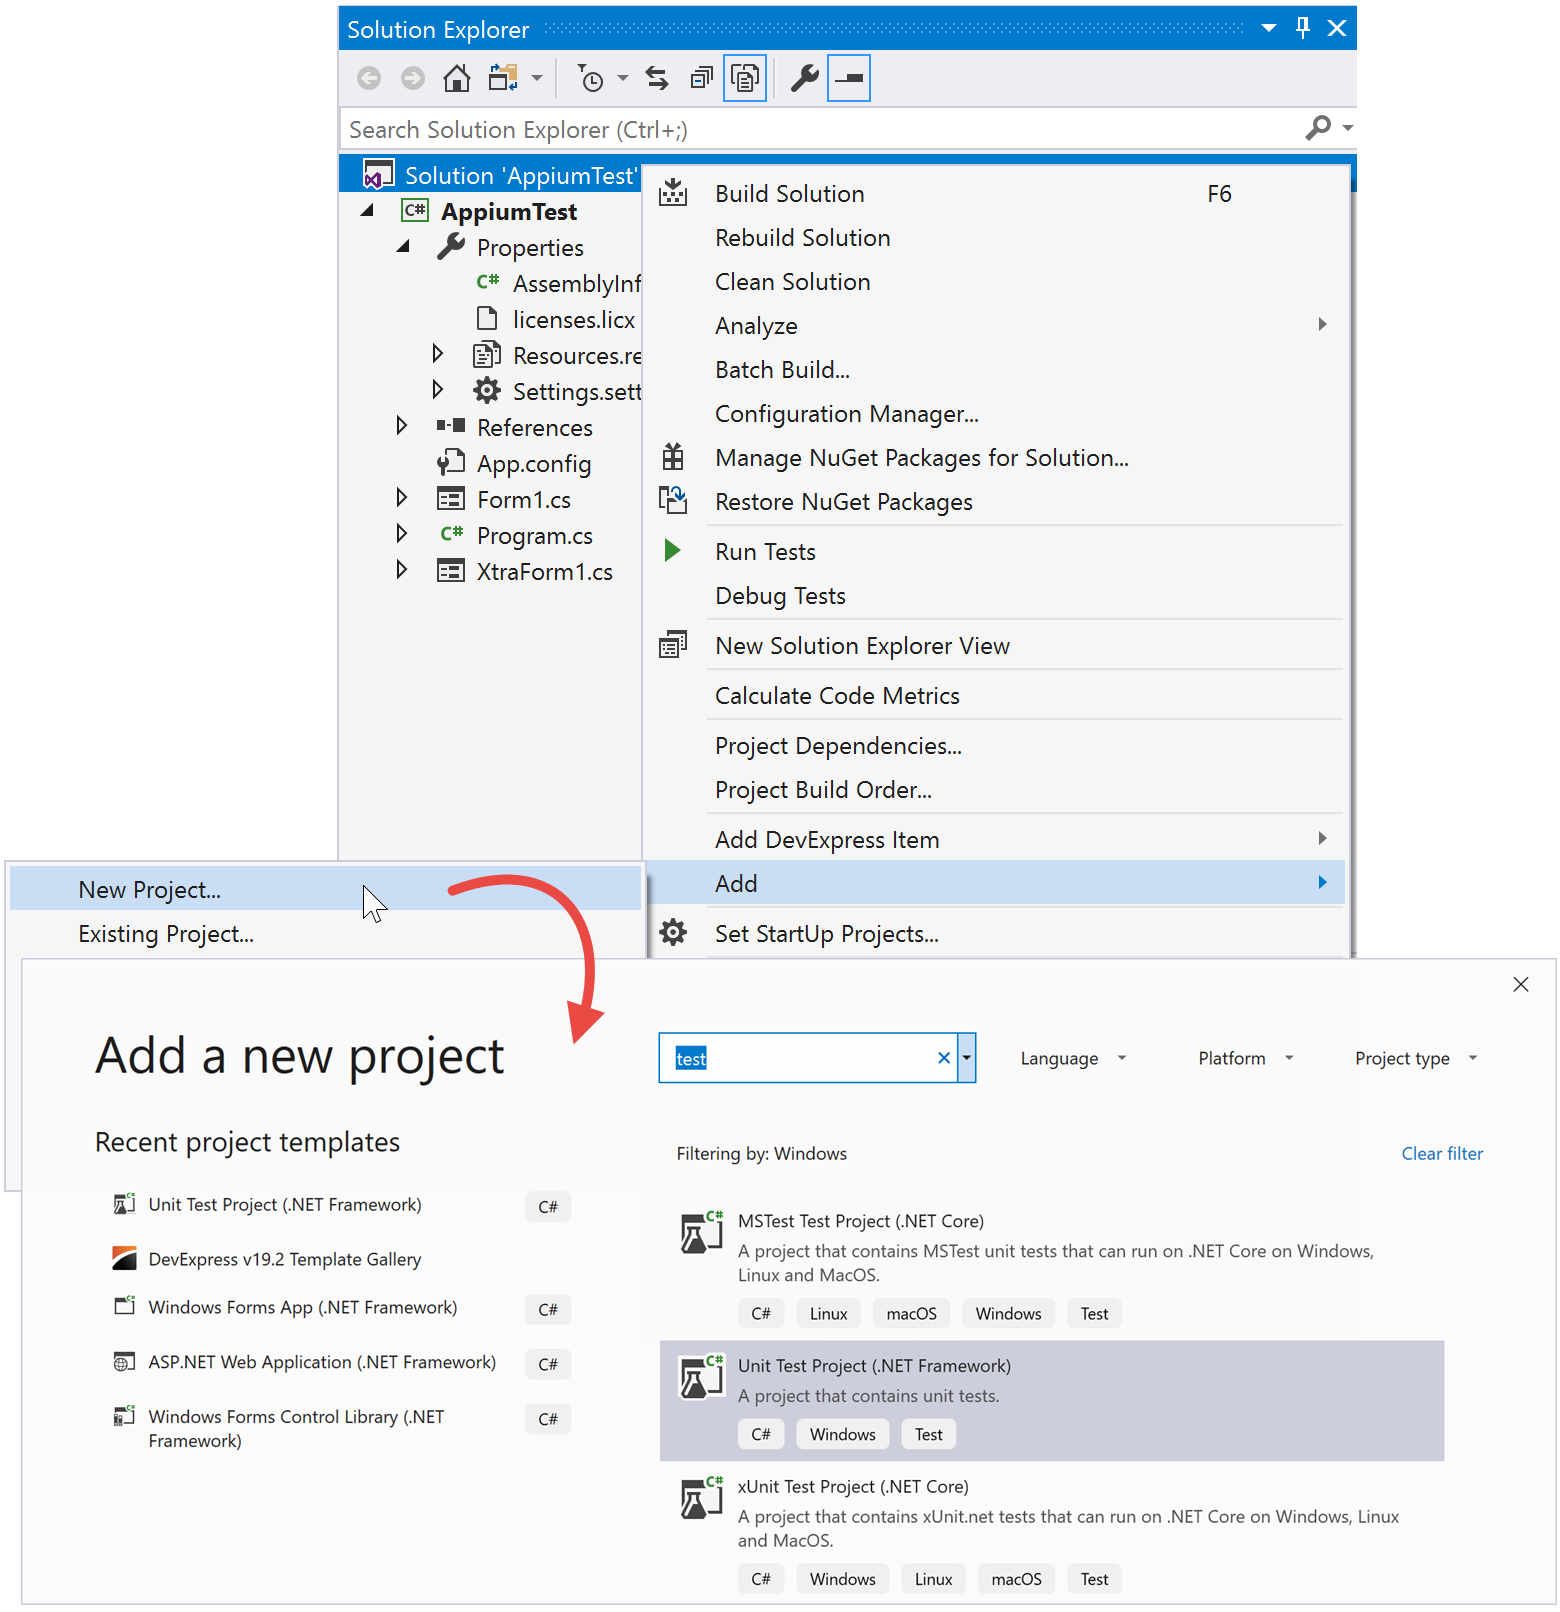
6. 在Solution Explorer中右键单击Unit Test project,然后选择“Manage NuGet Packages…”,安装最新的稳定Appium.WebDriver程序包。
7. 打开Unit Test项目的UnitTest1.cs文件,并添加两个类:MainDemoSession(定义开始和结束测试会话的方法)和Helper(包含查找被测试的UI元素的方法),将步骤3中的地址用作WindowsApplicationDriverUrl值。
public class MainDemoSession{protected const string WindowsApplicationDriverUrl = "http://127.0.0.1:4723";private const string ApplicationPath = @"C:Users...AppiumTest.exe";protected static WindowsDriver<WindowsElement> desktopSession;public static void Setup(TestContext context) { // Launch a new instance of the tested application if (desktopSession == null) { // Create a new session to launch the tested applicationAppiumOptions options = new AppiumOptions(); options.AddAdditionalCapability("app", ApplicationPath); desktopSession = new WindowsDriver<WindowsElement>( new Uri(WindowsApplicationDriverUrl), options); Assert.IsNotNull(desktopSession); Assert.IsNotNull(desktopSession.SessionId);// Set implicit timeout to 1.5 seconds //to make element search to retry every 500 ms //for at most three times desktopSession.Manage().Timeouts().ImplicitWait = TimeSpan.FromSeconds(1.5); } }public static void TearDown() { // Close the application and delete the session if (desktopSession != null) { desktopSession.Close(); desktopSession.Quit(); desktopSession = null; } } }public static class Helper { public static WindowsElement FindElementByAbsoluteXPath( this WindowsDriver<WindowsElement> desktopSession, string xPath, int nTryCount = 3) { WindowsElement uiTarget = null; while (nTryCount-- > 0) { try { uiTarget = desktopSession.FindElementByXPath(xPath); } catch { } if (uiTarget != null) { break; } else { System.Threading.Thread.Sleep(400); } } return uiTarget; } }
8. 修改自动生成的UnitTest1类,如下所示:
[TestClass]public class UnitTest1 : MainDemoSession{[TestMethod]public void TestMethod1(){//test start//test finish } [ClassInitialize] public static void ClassInitialize(TestContext context) { Setup(context); }[ClassCleanup] public static void ClassCleanup() { TearDown(); } }
9. 运行您的应用程序,并将其拖到主系统显示屏上(如果您具有多屏幕设置)。
10. 启动WinAppDriver UI Recorder然后点击“Record”, 将鼠标悬停在要与之交互的第一个UI元素上,然后等待它开始闪烁蓝色。Recorder的状态栏会将其文本从“Active”更改为“XPath Ready”。
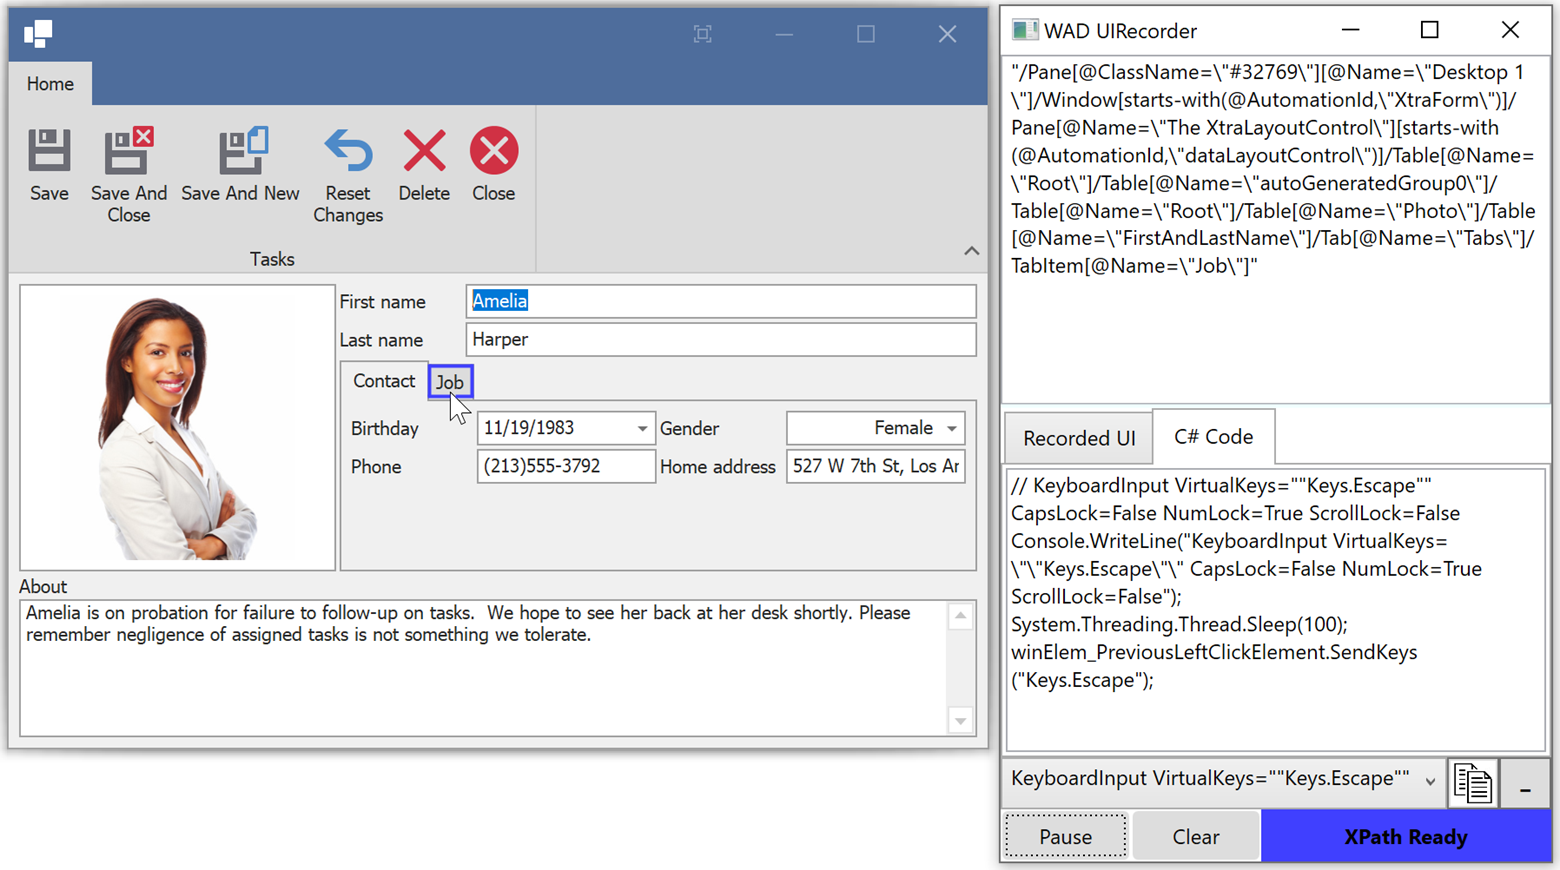
11. 当该元素闪烁时,recorder已准备就绪,您可以执行UI操作:单击此元素、将其拖动、输入新值等。完成此元素后,将鼠标悬停在另一个UI元素上,等待 recorder的确认并重复该过程。
12. 记录了要重现的一系列步骤后,请在recorder中单击“Pause”,您可以打开actions selector确保已记录所有UI操作。
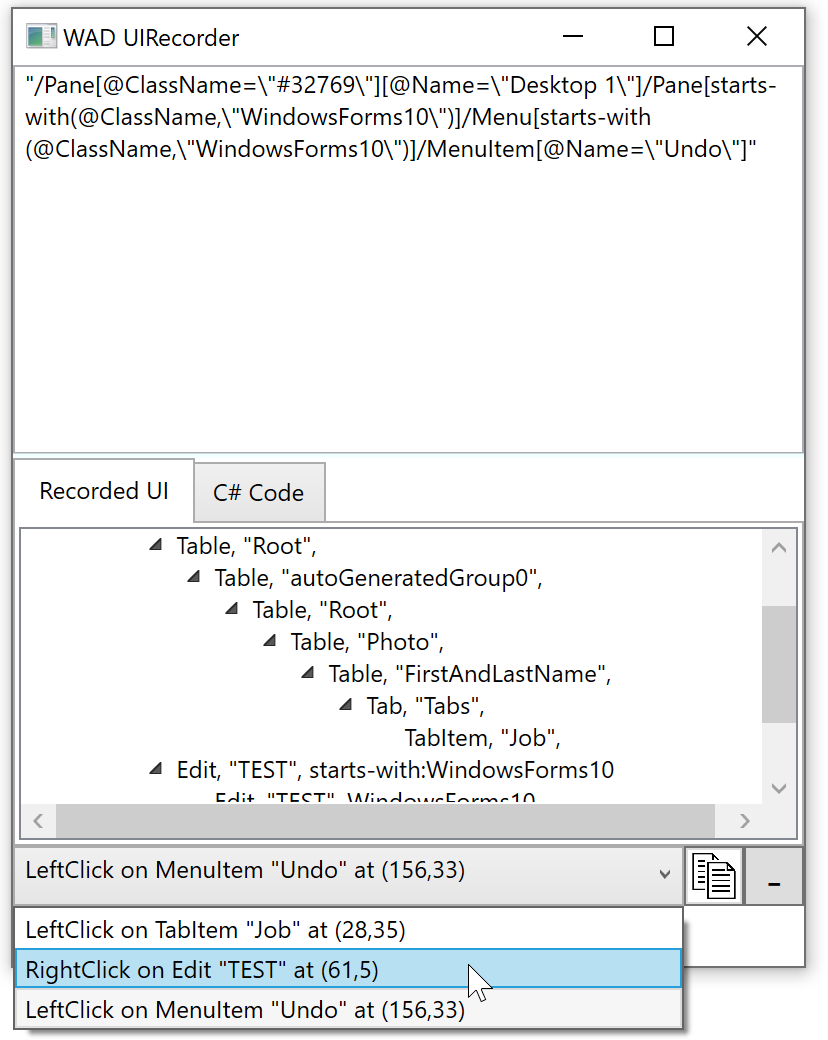
13. 单击“Generate and copy C# code to Clipboard”按钮来复制所有记录的操作代码,将此代码粘贴到UnitTest1.TestMethod1方法中。 例如,下面的代码选择“Job”标签。
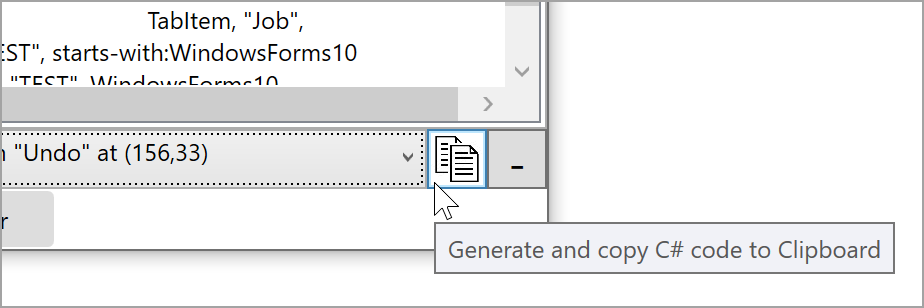
[TestMethod]  public void TestMethod1()  {//test start// LeftClick on TabItem "Job" at (20,31)Console.WriteLine("LeftClick on TabItem "Job"" at (20


声明:本站部分文章及图片源自用户投稿,如本站任何资料有侵权请您尽早请联系jinwei@zod.com.cn进行处理,非常感谢!