TeeChart Pro将自动为您定义所有Axis标签,并提供足够的灵活性来定制您可能具有的任何特定要求。TeeChart Pro提供真正的多轴。
下载TeeChart Pro VCL/FMX最新版本
已加入在线订购,现在抢购可立享特别优惠!!!
附加轴
复制轴
TeeChart提供5个轴与数据系列相关联:Left、Top、Bottom、Right和Depth。向图表添加新系列时,您可以定义系列应与哪些轴相关(转到“选项卡”“General”页面)。您可以使用Axis Customdraw方法在图表上的任何位置重复4个前轴中的任何一个(或全部)。请注意,此方法会复制Axis,但不会添加新的自定义轴。
您将找到这个名为“CustAxisProject1”的示例,其中包含TeeChart示例代码:
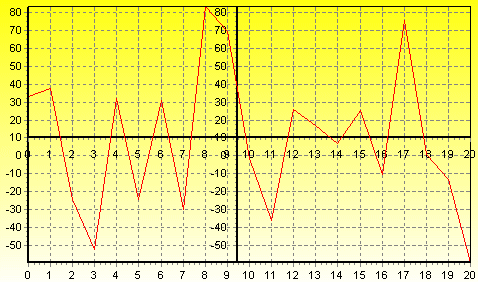
//fill the Series for this example with random dataprocedure TForm1.BitBtn1Click(Sender: TObject);Var t:integer;begin For t := 0 To 20 do Series1.AddXY(t, Random(100) - Random(70), '', clRed);end;//Put this code in the OnBeforeDrawValues() event:procedure TForm1.Series1BeforeDrawValues(Sender: TObject);var posaxis :Integer;begin With Chart1 do begin If Axes.Left.Maximum > 0 Then begin //When scrolling or on zoom always keep the gridlines enclosed in the Chart rectangle Canvas.ClipRectangle(ChartRect); //Always draw the 2nd vertical Axis at the middle point of the Chart posaxis := (ChartRect.Left) + (ChartRect.Right - ChartRect.Left) div 2; Axes.Left.CustomDraw(posaxis - 10, posaxis - 20, posaxis, True); //Draw the 2nd Horizontal axis at the level of "10" on the vertical axis posaxis := (Axes.Left.CalcYPosValue(10)); Axes.Bottom.CustomDraw(posaxis + 10, posaxis + 40, posaxis, True); Canvas.UnClipRectangle; end; end;end;

自定义轴
在此示例中,TeeChart将绘制新轴,一个水平,一个垂直位于图表的中心。当您滚动图表(用鼠标右键拖动)时,新的垂直轴将始终保持在图表的中心,新的水平轴将垂直滚动上下移动。新轴是默认轴的精确副本。
多个自定义轴
通过代码
procedure TForm1.BitBtn2Click(Sender: TObject);Var MyAxis : TChartAxis ;begin MyAxis := TChartAxis.Create( Chart1 ); Series2.CustomVertAxis := MyAxis; //You can modify any property of the new created axes, such as the axis color or axis title With MyAxis do begin Axis.Color:=clGreen ; Title.Caption := 'Extra axis' ; Title.Font.Style:=[fsBold]; Title.Angle := 90; PositionPercent := 20; //percentage of Chart rectangle end;end;
然后,您可以使用StartPosition和EndPosition属性将新轴与图表的整体关系定位。
StartPosition:=50;EndPosition:=100;
这些数字表示为图表矩形的百分比,其中0(零)(在垂直轴的情况下)为Top。这些属性可以应用于标准轴,以在图表中创建完全分区的“SubCharts”;。
With Chart1.Axes.Left do begin StartPosition:=0; EndPosition:=50; Title.Caption:='1st Left Axis'; Title.Font.Style:=[fsBold]; end;
以上2个编码示例与以下数据结合使用:
var t: integer;begin for t := 0 to 10 do begin Series1.AddXY(t,10+t,'',clTeeColor); if t > 1 then Series2.AddXY(t,t/2,'',clTeeColor); end;
将显示以下图表:

多轴
另一种添加自定义轴的技术如下,使用“Axis List”作为焦点,使用“List Add”,然后通过“Axis by Index”访问:
//Add data to Series:procedure TForm1.FormCreate(Sender: TObject);begin Series1.FillSampleValues(10); Series2.FillSampleValues(10);end;procedure TForm1.BitBtn1Click(Sender: TObject);var tmpVertAxis: TChartAxis; tmpHorizAxis: TChartAxis;begin {Add vertical Axis} Chart1.CustomAxes.Add; tmpVertAxis:=Chart1.CustomAxes[0]; tmpVertAxis.PositionPercent:=50; Series1.CustomVertAxis:=tmpVertAxis; {Add horizontal Axis} Chart1.CustomAxes.Add; tmpHorizAxis:=Chart1.CustomAxes[1]; tmpHorizAxis.Horizontal:=True; tmpHorizAxis.Axis.Color:=clGreen; tmpHorizAxis.PositionPercent:=50; Series1.CustomHorizAxis:=tmpHorizAxis;end;
建议在使用自定义轴时要小心,因为很容易开始用新轴填充屏幕并且无法跟踪您想要管理的轴!
轴事件
Axis事件提供运行时灵活性,可以修改Axis标签并在Axis Clicks上为用户提供交互性。
OnClickAxis
procedure TForm1.Chart1ClickAxis(Sender: TCustomChart; Axis: TChartAxis; Button: TMouseButton; Shift: TShiftState; X, Y: Integer);begin //Shows Axis point clicked when click on Bottom Axis. if Axis = Chart1.Axes.Bottom Then ShowMessage('Clicked Bottom Axis at ' + FloatToStr(Chart1.Axes.Bottom.CalcPosPoint(X)));end;
OnGetAxisLabel
procedure TForm1.Chart1GetAxisLabel(Sender: TChartAxis; Series: TChartSeries; ValueIndex: Integer; var LabelText: String);begin if Sender = Chart1.Axes.Bottom Then Case StrToInt(FormatDateTime('mm', StrToDate(LabelText))) of 1,2,3 : LabelText := '1st Qtr'; 4,5,6 : LabelText := '2nd Qtr'; end;end;
OnGetNextAxisLabel
procedure TForm1.Chart1GetNextAxisLabel(Sender: TChartAxis; LabelIndex: Integer; var LabelValue: Double; var Stop: Boolean);begin Stop:=False; if Sender = Chart1.Axes.Bottom Then begin if LabelValue>=5 then LabelValue:=LabelValue+5 else LabelValue:=5; end else Stop:=True;end;
以上示例将开始在每5个点的底轴标记处标记为’5’。其他轴标签不受影响。
查看Teechart.Net系列教程>>
购买TeeChart Pro VCL/FMX正版授权,请点击“咨询在线客服”哟!
标签:
声明:本站部分文章及图片源自用户投稿,如本站任何资料有侵权请您尽早请联系jinwei@zod.com.cn进行处理,非常感谢!