使用条形码识别在文档数字化中自动分类
【Dynamic Web TWAIN最新版免费下载>>>】
介绍
环境
Windows
本地Web服务器
步骤
步骤1 创建一个新目录DocumentsSeparation在其中创建一个新页面index.html
<!DOCTYPE html> <html> <head> <meta http-equiv="Content-Type" content="text/html; charset=utf-8" /> <title>Documents Separation</title> </head> <body> </body></html>
步骤2 参考核心JavaScript库
<head> <meta http-equiv="Content-Type" content="text/html; charset=utf-8" /> <title>Documents Separation</title> <script src="https://tst.dynamsoft.com/libs/dwt/14.2/dynamsoft.webtwain.config.js"></script> <script src="https://tst.dynamsoft.com/libs/dwt/14.2/dynamsoft.webtwain.initiate.js"></script> <script src="https://tst.dynamsoft.com/libs/dbr/6.3/dynamsoft.barcodereader.config.js"> </script> <script src="https://tst.dynamsoft.com/libs/dbr/6.3/dynamsoft.barcodereader.initiate.js"></script></head>
注意:此处引用了在线JavaScript文件。在项目中,你应该引用项目中的相应文件。如果你以前在本地安装了Dynamic Web TWAIN产品,也可以在以下目录中找到相同的文件。
C:Program Files (x86)DynamsoftDynamic Web TWAIN SDK {version number} {Trial}Resource
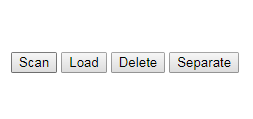
步骤3 添加DIV和几个按钮
<body> <input type="button" value="Scan" onclick="AcquireImage();" /> <input type="button" value="Load" onclick="LoadImages();" /> <input type="button" value="Delete" onclick="RemoveImages();" /> <input type="button" value="Separate" onclick="UploadFiles();" /> <br /> <br /> <div id="dwtcontrolContainer" style="float: left"></div></body>
效果如下:

步骤4 添加初始化代码
<script type="text/javascript"> var dbrObject, DWObject; window.onload = function () { if (Dynamsoft && (!Dynamsoft.Lib.env.bWin || !Dynamsoft.Lib.product.bChromeEdition)) { var ObjString = []; ObjString.push('<div class="p15">'); ObjString.push("Current browser is not supported, please use Chrome, Firefox, Edge or IE 11"); ObjString.push('</div>'); Dynamsoft.WebTwainEnv.ShowDialog(400, 180, ObjString.join('')); if (document.getElementsByClassName("dynamsoft-dialog-close")) document.getElementsByClassName("dynamsoft-dialog-close")[0].style.display = "none"; } else { Dynamsoft.WebTwainEnv.Load(); } }; Dynamsoft.WebTwainEnv.AutoLoad = false; //Dynamsoft.WebTwainEnv.ProductKey = '***'; Dynamsoft.WebTwainEnv.RegisterEvent('OnWebTwainReady', Dynamsoft_OnReady); dynamsoft.dbrEnv.onAutoConnectServiceSuccess = function() { dbrObject = new dynamsoft.BarcodeReader(); } dynamsoft.dbrEnv.onAutoConnectServiceError = function(ex) { console.log('Initialization failed with error code: ' + (ex.message || ex)); } function Dynamsoft_OnReady() { DWObject = Dynamsoft.WebTwainEnv.GetWebTwain('dwtcontrolContainer'); if (DWObject) { DWObject.SetViewMode(3, 3); } }</script>
步骤5 在浏览器中打开index.html。如果之前未安装,请按照页面上的提示安装相应的扫描和条形码识别控件。此安装过程只需在每台计算机上完成一次
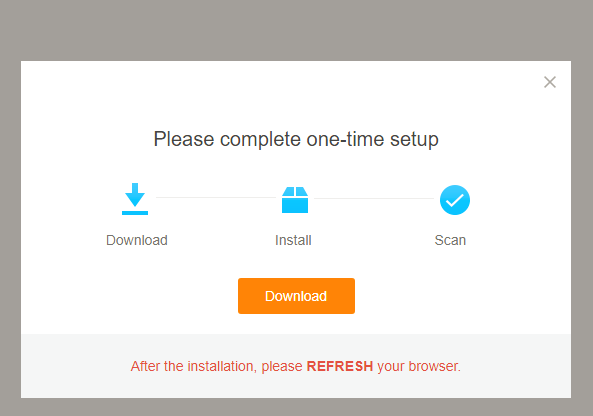
通常的安装路径为 C:WindowsSysWOW64DynamsoftDynamsoftService
- DynamsoftService.exe
- dwt_trial_14.1.0.0828.dll
- DynamsoftBarcodeReaderx86_6.3.dll
- dbr_6.3.0.0723.dll
步骤6 添加按钮的代码
function AcquireImage() { if (DWObject) { DWObject.SelectSource(function () { var OnAcquireImageSuccess, OnAcquireImageFailure; OnAcquireImageSuccess = OnAcquireImageFailure = function () { DWObject.CloseSource(); }; DWObject.OpenSource(); DWObject.IfDisableSourceAfterAcquire = true; DWObject.AcquireImage(OnAcquireImageSuccess, OnAcquireImageFailure); }, function () { console.log('Failed to select a source'); }); }}function LoadImages() { if (DWObject) { DWObject.LoadImageEx('', 5, function () { }, function (errorCode, errorString) { console.log('ailed to load a file with the error code:' + errorString); } ); }}function RemoveImages() { if (DWObject) DWObject.RemoveAllSelectedImages();}
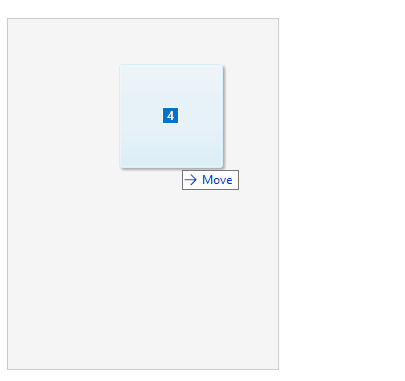
步骤7 刷新页面。此时,你可以调用本地扫描仪加载本地图像,或删除所选图像。你甚至可以直接拖动本地图像直接加载它
步骤8 添加条码识别码,因为条码有很多种类,我们先添加一个选择框,相应的代码如下
HTML
<select size="1" id="barcodeformat"></select>
JavaScript
var BarcodeInfo = [ { desc: "All", val: 503317503 }, { desc: "1D Barcodes", val: 1023 }, { desc: "QR Code", val: 67108864 }, { desc: "PDF417", val: 33554432 }, { desc: "DATAMATRIX", val: 134217728 }, { desc: "AZTEC", val: 268435456 }, { desc: "CODE_39", val: 1 }, { desc: "CODE_128", val: 2 }, { desc: "CODE_93", val: 4 }, { desc: "CODABAR", val: 8 }, { desc: "ITF", val: 16 }, { desc: "EAN_13", val: 32 }, { desc: "EAN_8", val: 64 }, { desc: "UPC_A", val: 128 }, { desc: "UPC_E", val: 256 }, { desc: "INDUSTRIAL_25", val: 512 } ];// Add the following code to the function `Dynamsoft_OnReady` mentioned abovefor (var index = 0; index < BarcodeInfo.length; index++) document.getElementById("barcodeformat").options.add(new Option(BarcodeInfo[index].desc, index));document.getElementById("barcodeformat").options.selectedIndex = 0;
步骤9 有三种方法可以对文档进行分类
使用条形码图像启动每个文档
仅使用带条形码的图像作为分隔符,而不将其包含在任何文档中
每个页面都有一个Barode,具有相同条形码的图像属于同一个文件
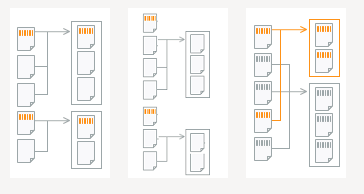
我们将在代码中实现这三种方式
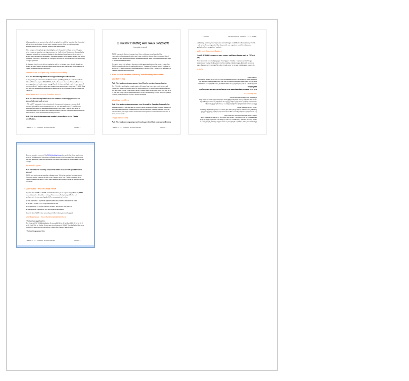
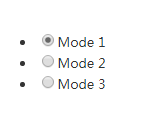
<div style="float: left; margin-left: 20px;"> <ul style="list-style: none; min-height: 20px;"> <li style="width:118px; float: left; text-align: center;"> <label for="mode1"> <input type="radio" name="UploadModes" checked="checked" value="mode1">Mode 1</label> </li> <li style="width:118px; float: left; text-align: center;"> <label for="mode2"> <input type="radio" name="UploadModes" value="mode2" id="mode2">Mode 2</label> </li> <li style="width:118px; float: left; text-align: center;"> <label for="mode3"> <input type="radio" name="UploadModes" value="mode3" id="mode3">Mode 3</label> </li> </ul> <br /> <ul style="list-style: none; min-height: 180px;"> <li style="width:118px; height:176px; float: left; background: url('https://tst.dynamsoft.com/libs/dbr/modes/Mode1.png') center no-repeat"> </li> <li style="width:118px; height:176px; float: left; background: url('https://tst.dynamsoft.com/libs/dbr/modes/Mode2.png') center no-repeat"> </li> <li style="width:118px; height:176px; float: left; background: url('https://tst.dynamsoft.com/libs/dbr/modes/Mode3.png') center no-repeat"> </li> </ul>
效果如下:
下一篇文章将为大家介绍添加分类的JavaScript代码以及如何接受分离的文件。
想要购买正版授权,或者获取更多Dynamic Web TWAIN相关信息的朋友可以点击” 咨询在线客服 “~
标签:扫描识别图像处理扫描与图像
声明:本站部分文章及图片源自用户投稿,如本站任何资料有侵权请您尽早请联系jinwei@zod.com.cn进行处理,非常感谢!