ActiveReports Web端在线 表设计器已经正式上线!
现在我们就来教您,如何创建一个简单的 ActiveReports Web端在线 表设计器(文末有示例源码,请大家下载体验),如您想体验ActiveReports 在线 表设计器的全部功能,请登陆 ActiveReports 官 ,点击在线 表设计器菜单。
创建步骤
-
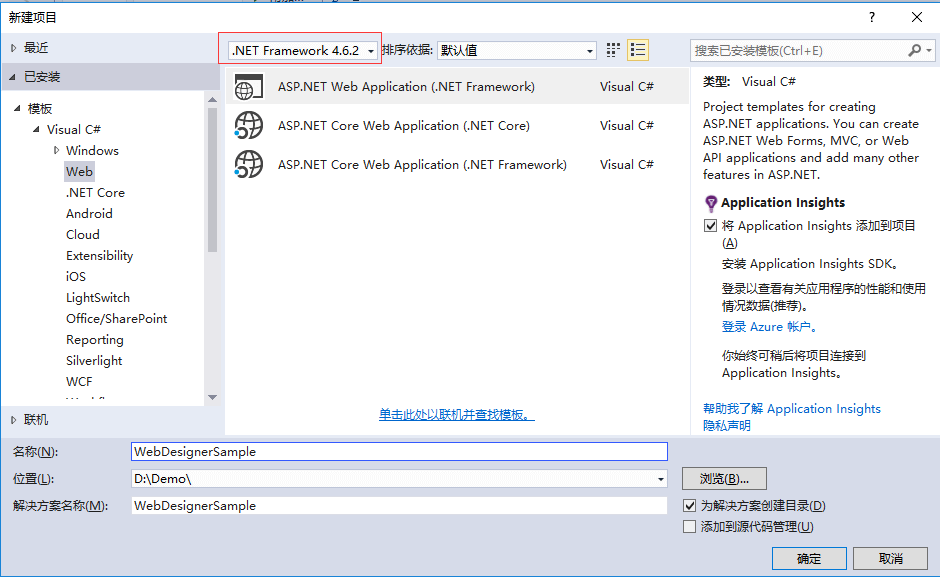
打开VS,然后创建一个 .Net Framework 4.6.2的ASP .NET Empty Web Application的空项目

-
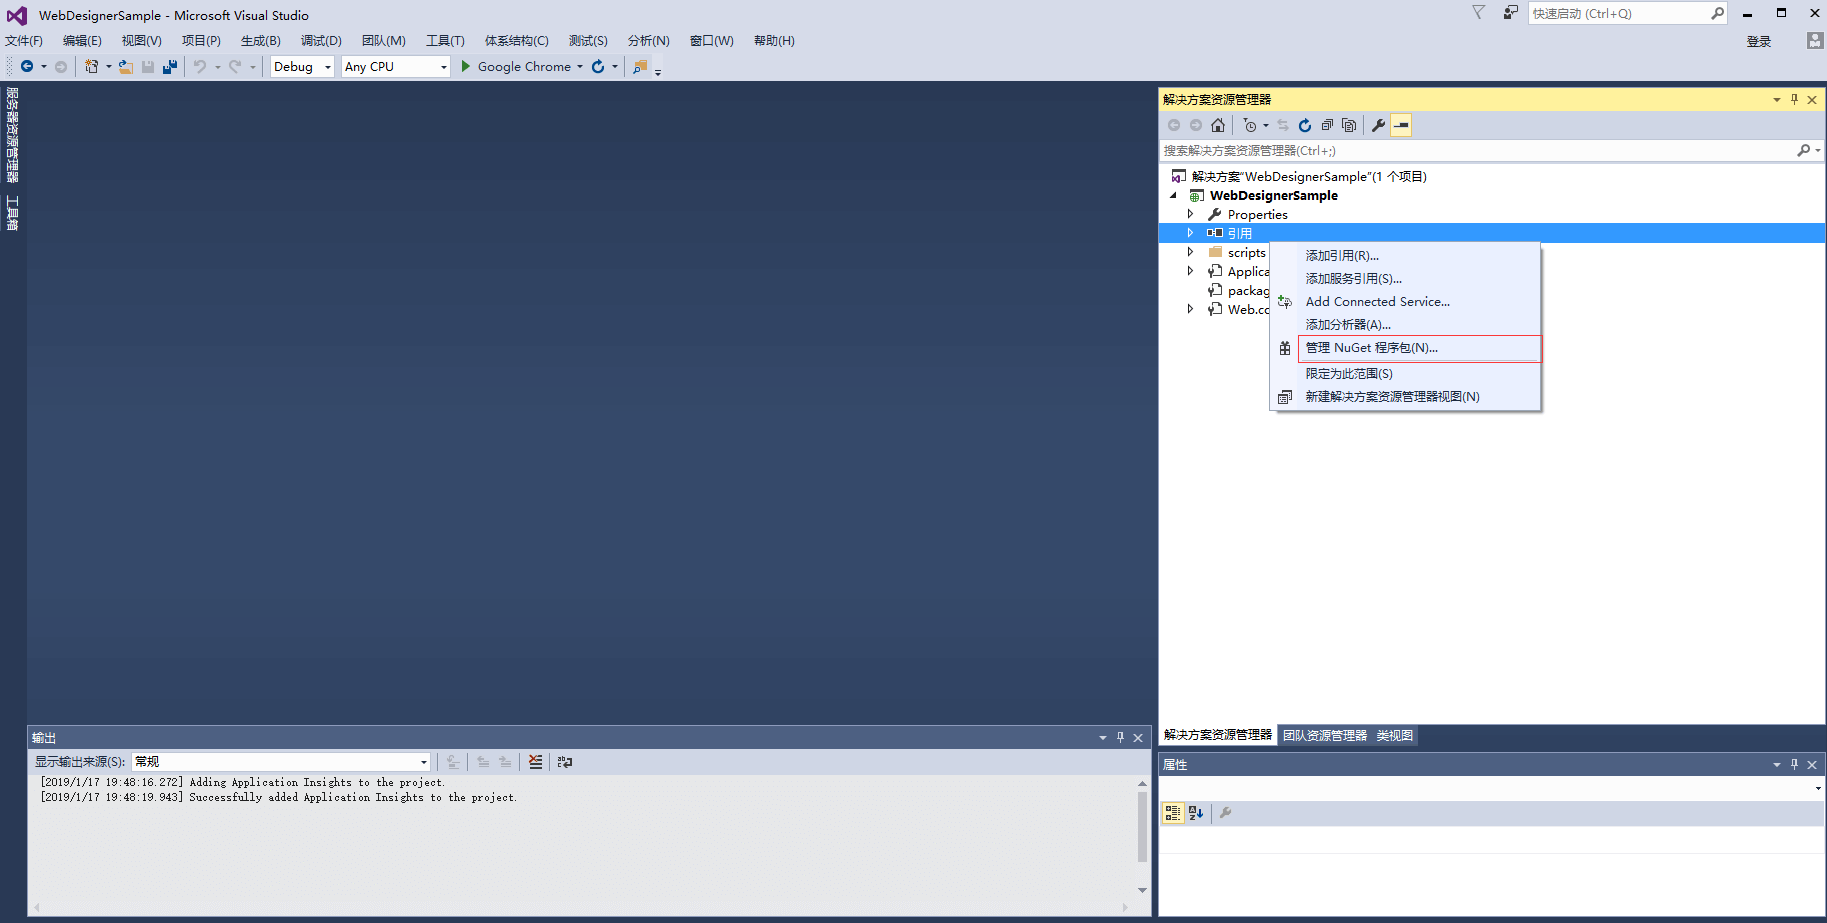
选中引用,然后右键>> 管理NuGet程序包 >>点击
-
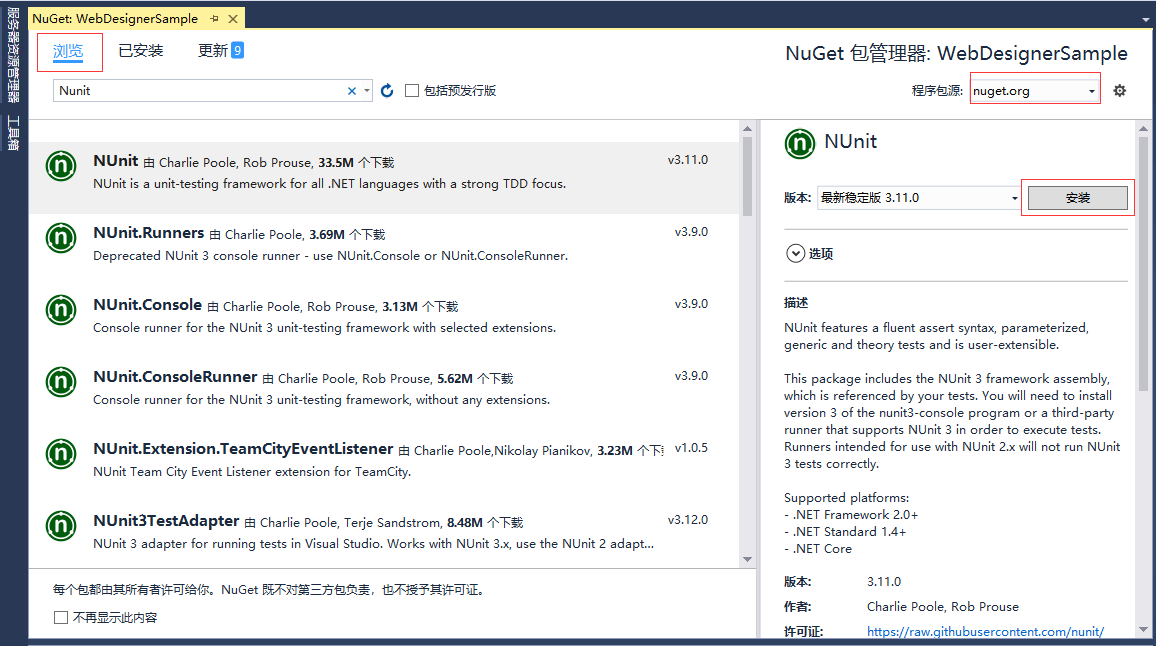
选择“浏览”,然后在查询框中输入” Nunit”, 点击安装
-
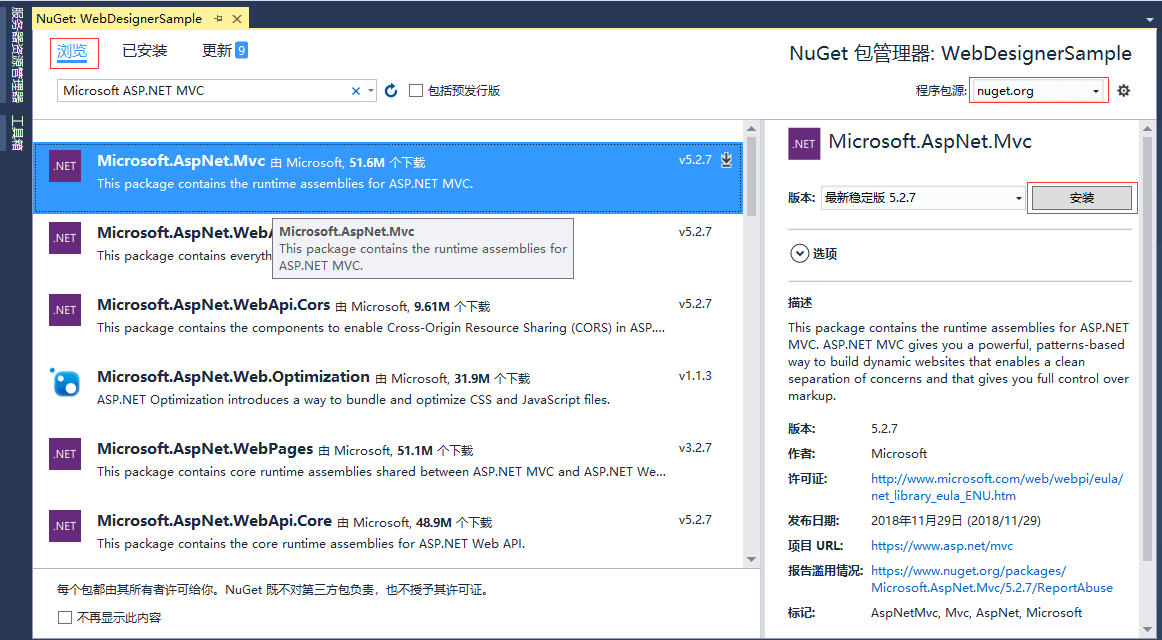
在查询框中输入“Microsoft ASP.NET MVC”,点击安装,然后选择“我接受”
-
在查询框中输入“OWIN”,点击安装

-
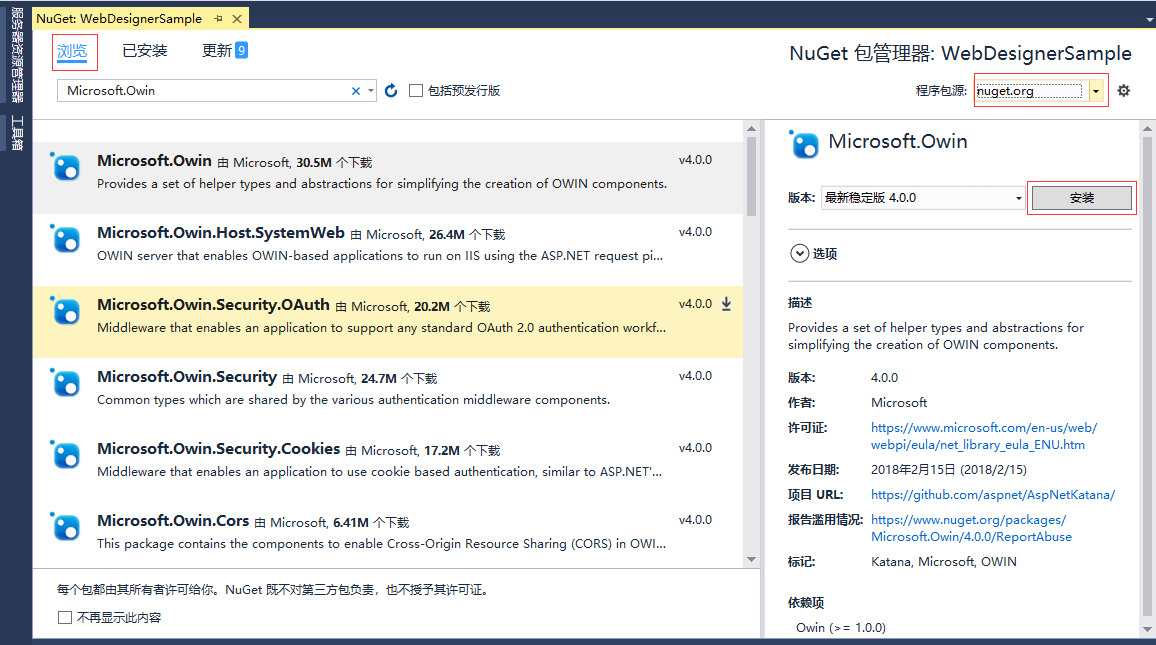
在查询框中输入” Microsoft.Owin” ,点击安装,然后选择“我接受”
-
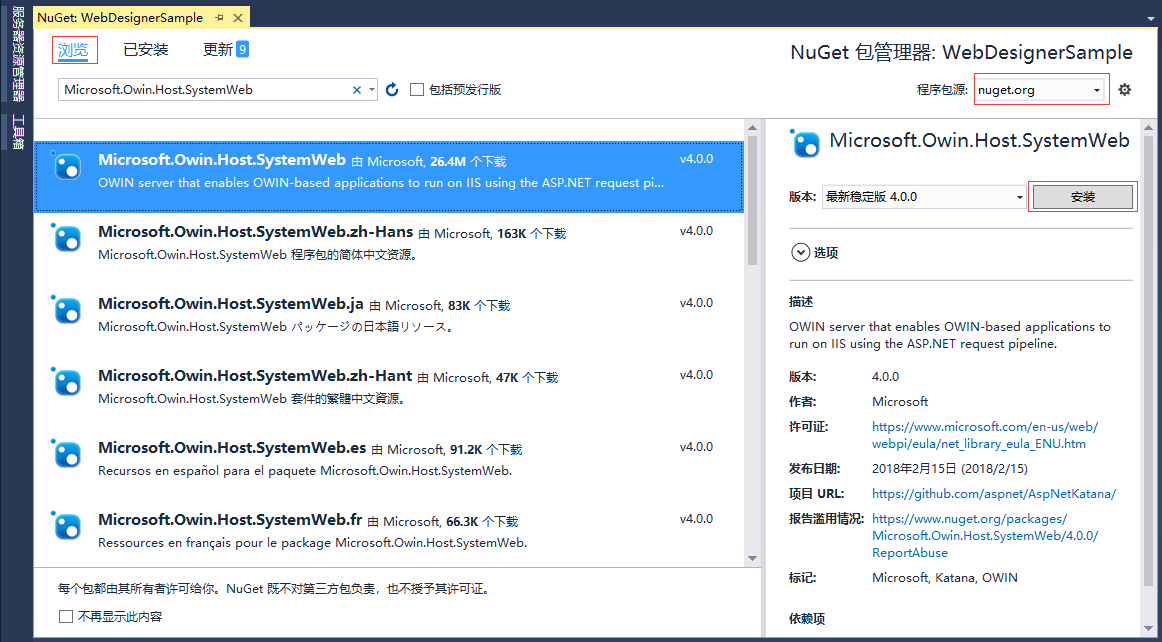
在查询框中输入“ Microsoft.Owin.Host.SystemWeb”,点击安装,然后选择“我接受”
-
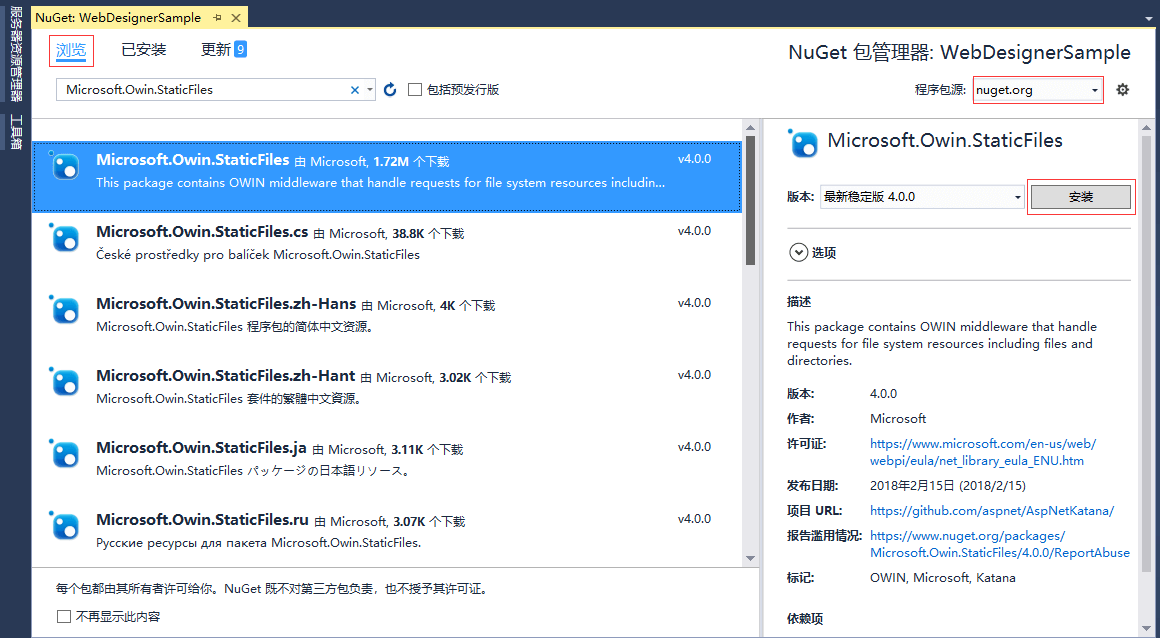
在查询框中输入“ Microsoft.Owin.StaticFiles”,点击安装,然后选择“我接受”
-
在查询框中输入“ Microsoft.Owin.FileSystems”,如果显示“已安装”,则跳过此步骤。

-
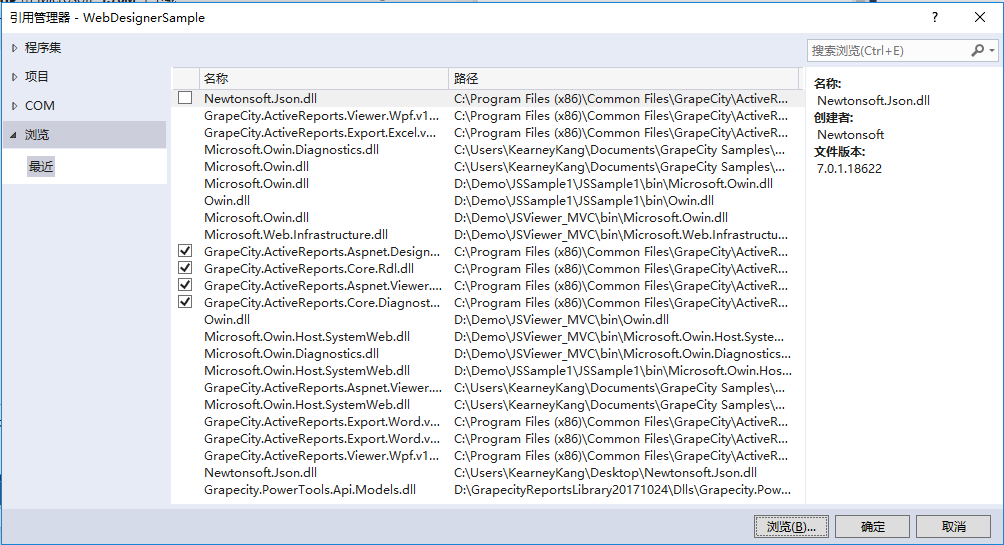
添加引用

-
添加如下引用,引用的具体路径:
C:Program Files (x86)Common FilesGrapeCityActiveReports 13
添加引用如下:
-
GrapeCity.ActiveReports.Aspnet.Viewer
-
GrapeCity.ActiveReports.Aspnet.Designer
-
GrapeCity.ActiveReports.Core.Diagnostics
-
Grapecity.ActiveReports.Core.Rdl
-
-
在项目中新添加一个新的文件
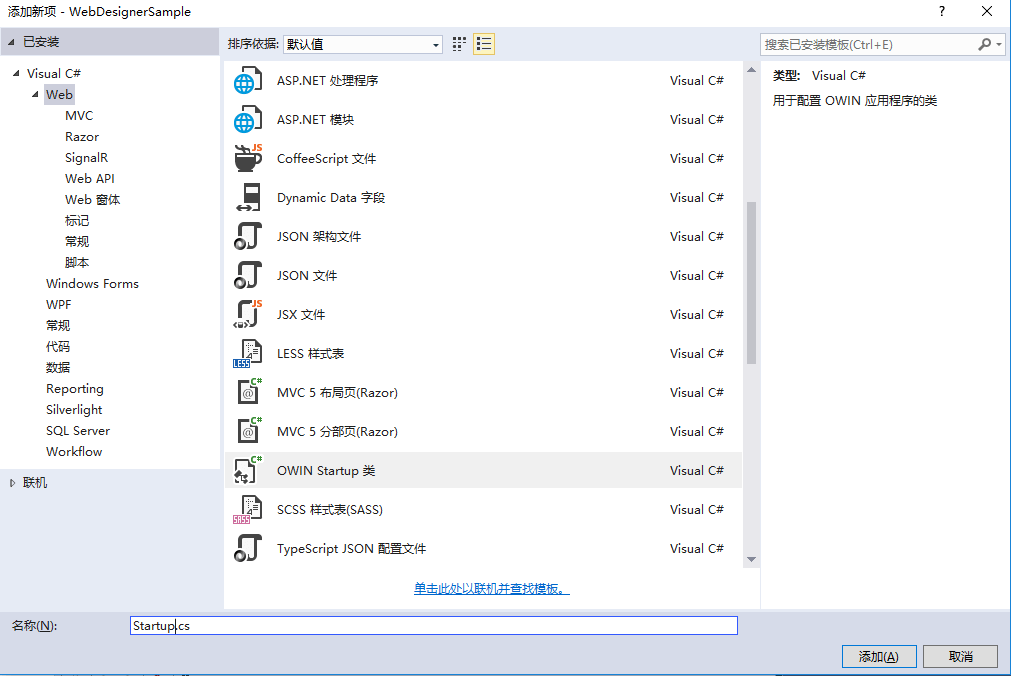
-
在新的 Startup.cs 的代码替换如下代码:
using System; using System.IO; using System.Linq; using System.Web; using GrapeCity.ActiveReports.Aspnet.Designer; using Owin; using Microsoft.Owin; using Microsoft.Owin.StaticFiles; using Microsoft.Owin.FileSystems; using System.Web.Mvc; using System.Web.Routing; [assembly: OwinStartup(typeof(AspNetDesignerSample.Startup))] namespace AspNetDesignerSample { public class Startup { // resources (reports, themes, images) location private static readonly DirectoryInfo ResourcesRootDirectory = new DirectoryInfo(String.Format("{0}.\resources\", HttpRuntime.AppDomainAppPath)); public void Configuration(IAppBuilder app) { // web designer middleware app.UseDesigner(config => config.UseFileStore(ResourcesRootDirectory)); // static files middlewares var fileSystem = new PhysicalFileSystem(String.Format("{0}.\wwwroot\", HttpRuntime.AppDomainAppPath)); app.UseDefaultFiles(new DefaultFilesOptions { DefaultFileNames = new[] { "index.html" }, FileSystem = fileSystem }); app.UseStaticFiles(new StaticFileOptions { FileSystem = fileSystem }); } } } -
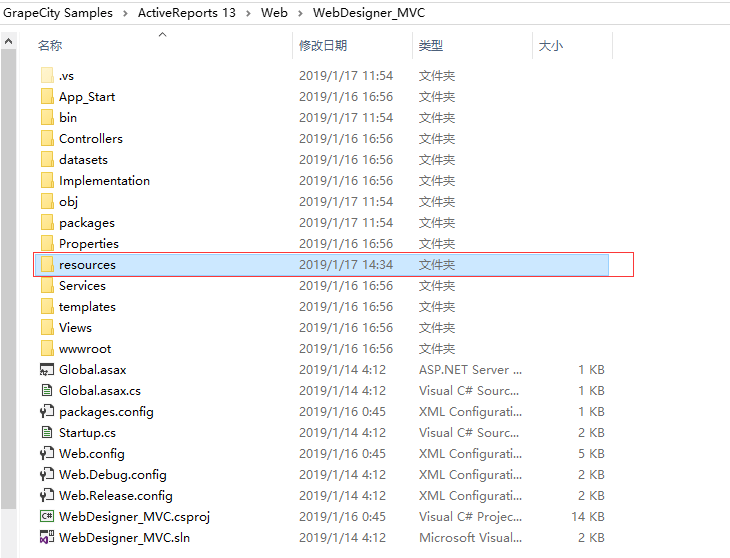
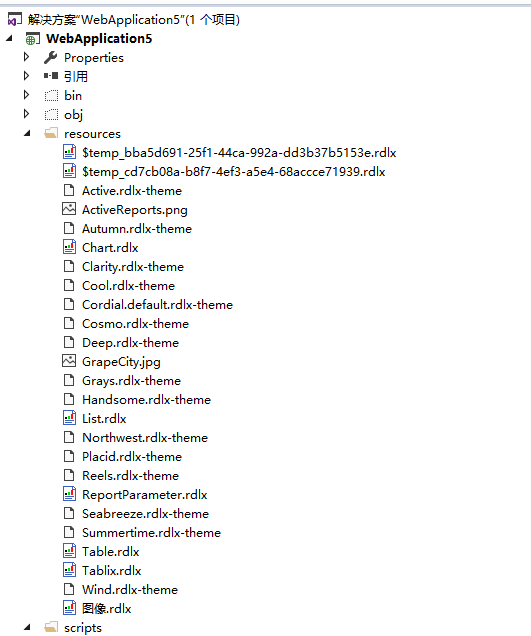
在项目中创造一个’resourse’ 的文件,然后在可以在这个文件里放 表文件、主题、图片。为了方便你可以直接把web在线 表设计器源码里的 ’resourse’整个文件直接赋值粘贴到你当前的项目中,然后把 ’resourse’ 里的所有文件都是全部选择包含在项目中
源码路径:
C:Users******DocumentsGrapeCitySamplesActiveReports 13WebWebDesigner_MVC
-
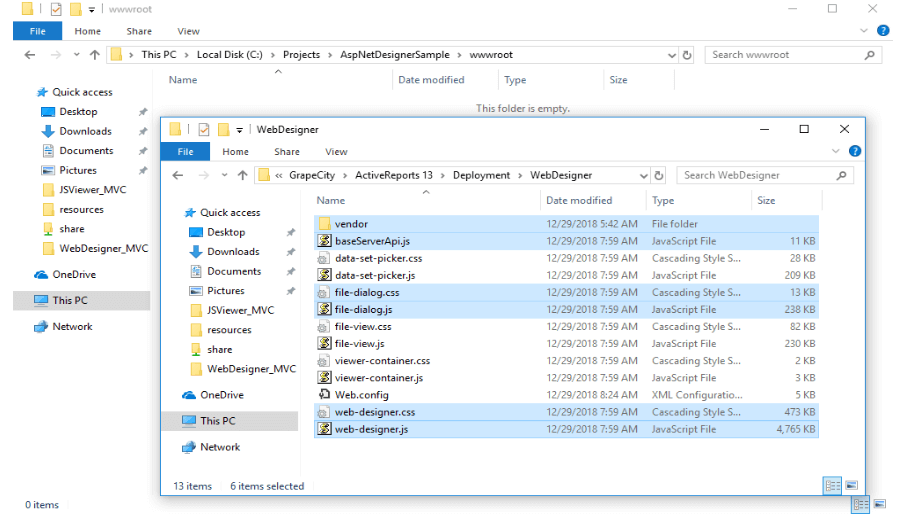
在该路径下C:Program Files (x86)GrapeCityActiveReports 13DeploymentWebDesigner folder on 64-bit Windows.
复制 Web.Config 去替换项目中的已存在的 Web.Config 文件,注意需要移除Web.Config 中的如下配置。
<handlers> <add name="AllUris" path="*" verb="*" type="System.Web.Handlers.TransferRequestHandler" preCondition="integratedMode" /> </handlers>
-
在项目中新建一个 ’ wwwroot’ 文件,然后再在里面添加如下文件
- baseServerApi.js
- web-designer.css
- web-designer.js
- vendor
-
在项目中新添加一个新的 HTMLpage
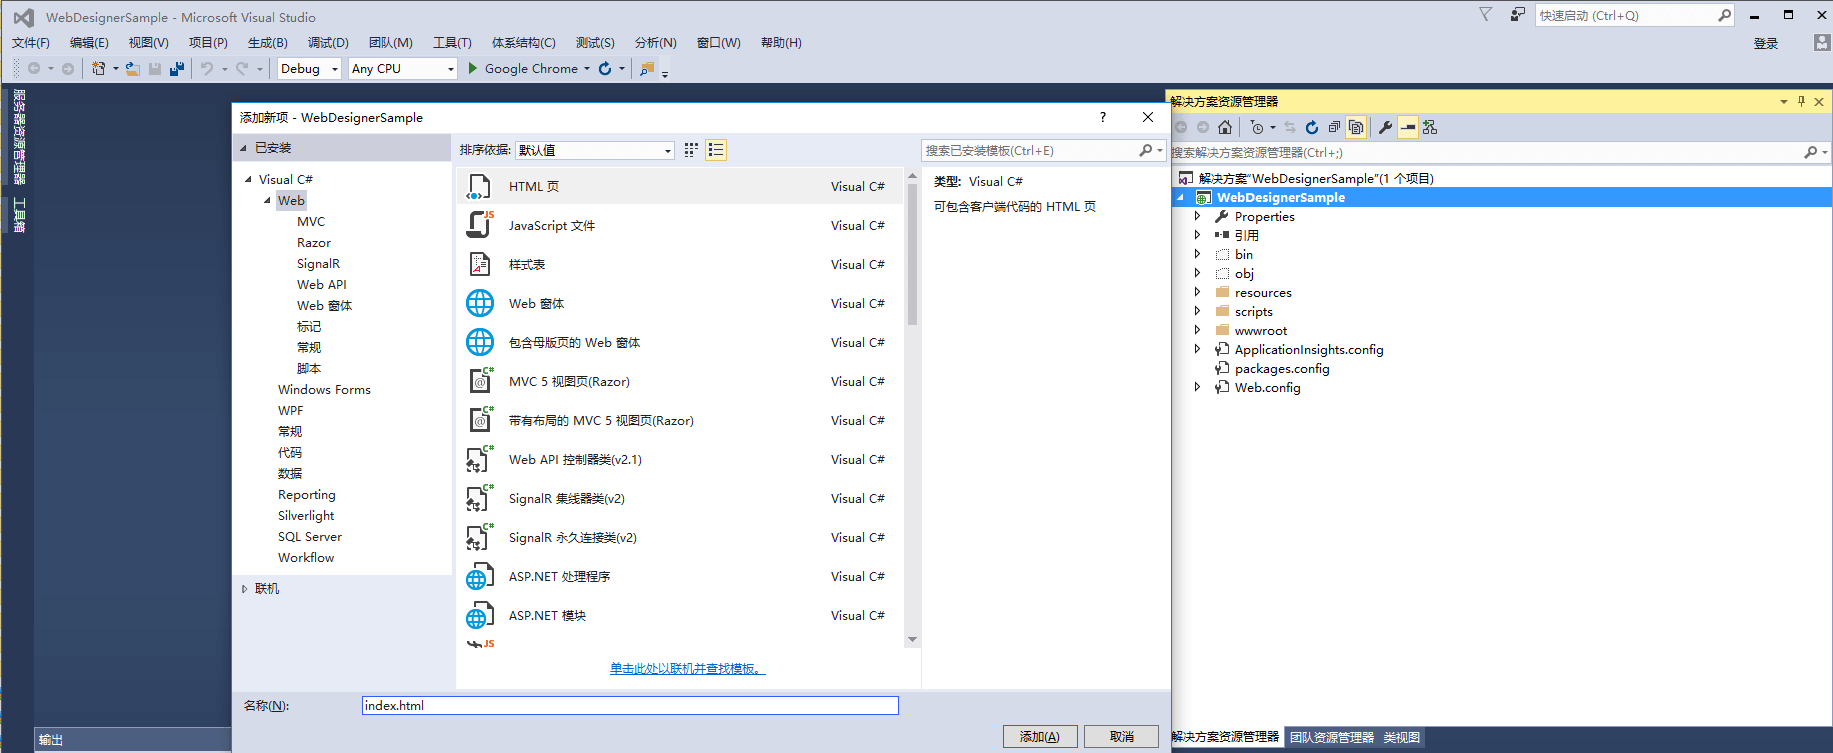
-
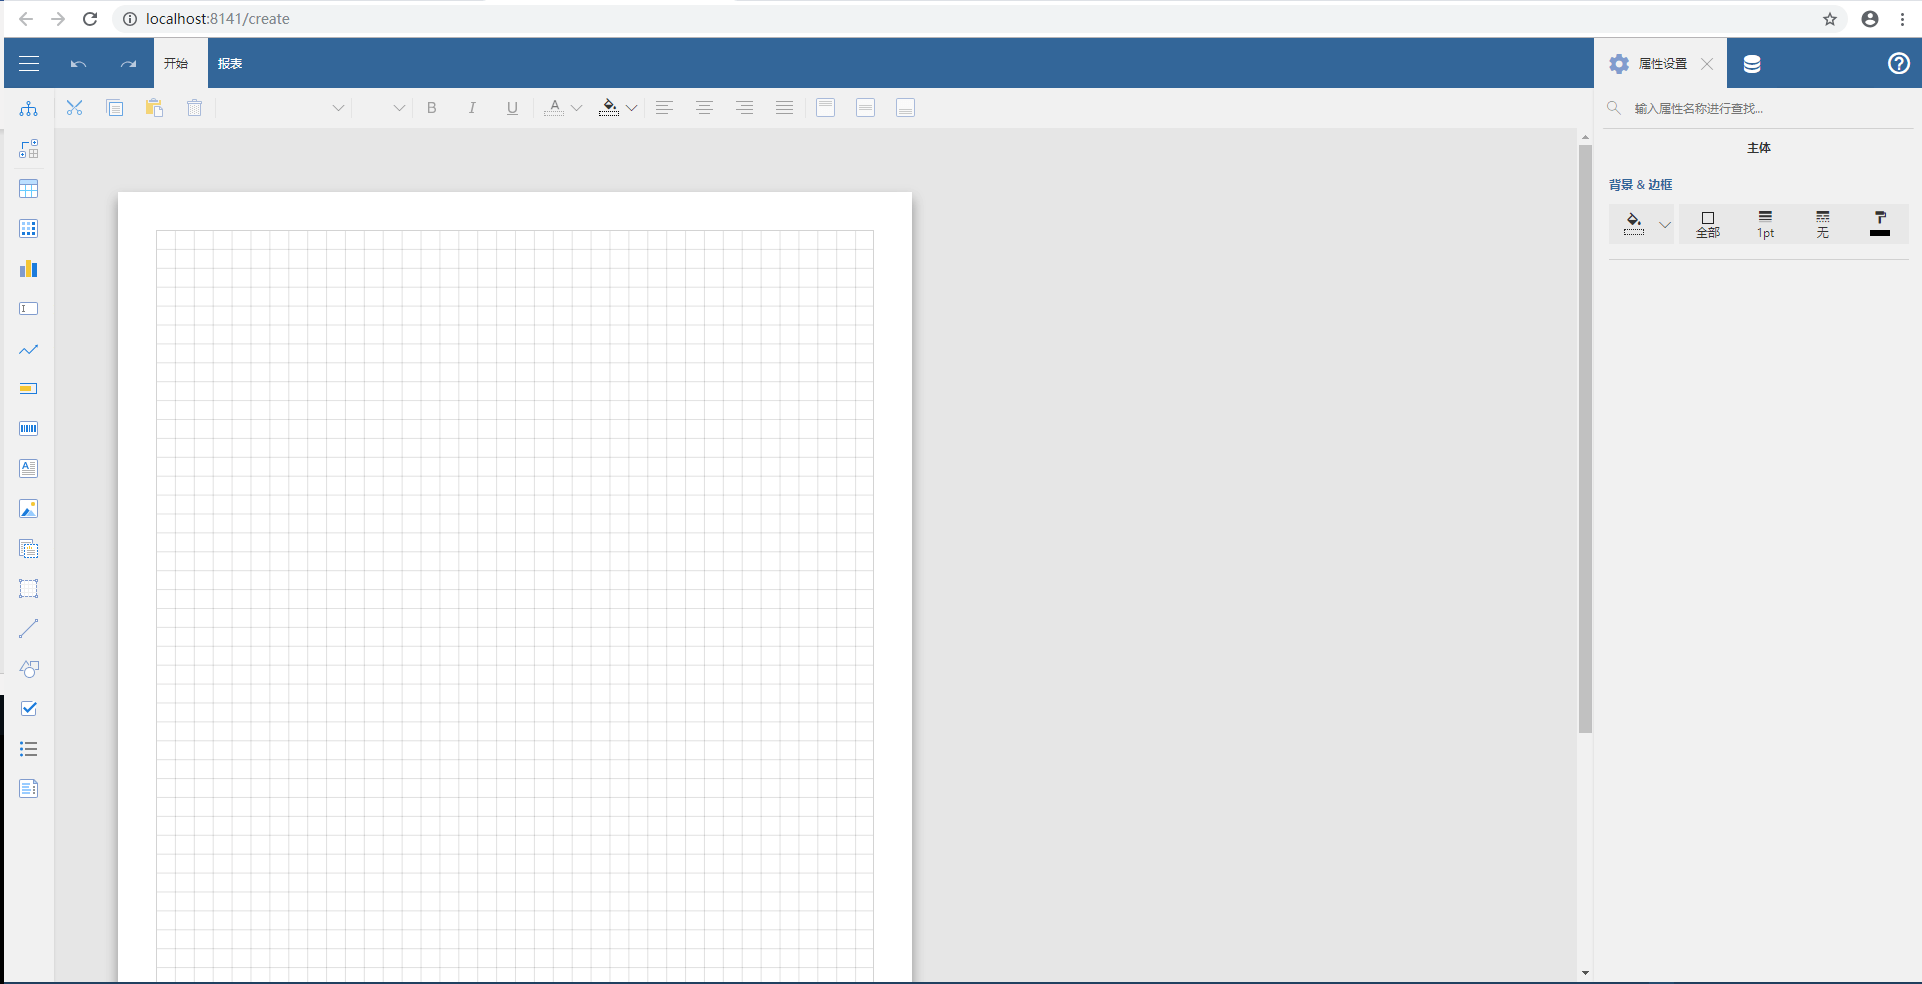
在项目中打开 index页面,然后修改其内容,如下所示
<!DOCTYPE html> <html> <head> <title>Web Designer Sample</title> <meta charset="utf-8"> <meta name="viewport" content="width=device-width, initial-scale=1"> <meta http-equiv="x-ua-compatible" content="ie=edge"> <!-- designer-related css --> <link rel="stylesheet" href="vendor/css/materialdesignicons.min.css" media="all" type="text/css" /> <link rel="stylesheet" href="vendor/css/bootstrap.min.css" /> <link rel="stylesheet" href="vendor/css/font-awesome.min.css"> <link rel="stylesheet" href="vendor/css/ionicons.min.css"> <link rel="stylesheet" href="vendor/css/fonts-googleapis.css" type="text/css"> <link rel="stylesheet" href="web-designer.css" /> </head> <body class="theme-blue"> <!-- designer-related js --> <script src="vendor/js/jquery.min.js"> </script> <script src="vendor/js/bootstrap.min.js"> </script> <script src="baseServerApi.js"> </script> <script src="web-designer.js"> </script> <!-- designer root div --> <div id="designer-id" style="width: 100%; height: 100%;"></div> <script> // create designer options var designerOptions = GrapeCity.ActiveReports.WebDesigner.createDesignerOptions(baseServerApi); // render designer application GrapeCity.ActiveReports.WebDesigner.renderApplication('designer-id', designerOptions); </script> </body> </html> - 最后运行结果:
-
首先你需要在index.html的 createDesignerOptions() 的函数后面添加
designerOptions.reportInfo.id = "MyReport.rdlx";
“MyReport.rdlx” 表是在项目’resources’中存在的 表文件,不然就会找不到 表路径,显示不出来。
-
添加 css 文件
<link rel="stylesheet" href="file-dialog.css" /> <link rel="stylesheet" href="web-designer.css" />
-
添加 JS 文件
<link rel="stylesheet" href="file-dialog.css" /> <link rel="stylesheet" href="web-designer.css" />
- 复制下面的<div>替换 index.html 中原来的<div>
<!-- designer root div --> < div id="designer-id" style="width: 100%; height: 100%;"></div> <!-- save as dialog root div --> < div id="save-as-dialog-id" style="position: absolute; top: 0; left: 0; width: 100%; height: 100%; display: none; z-index: 9999;"></div>
- 替换 index.html中的<Script> 中的内容:
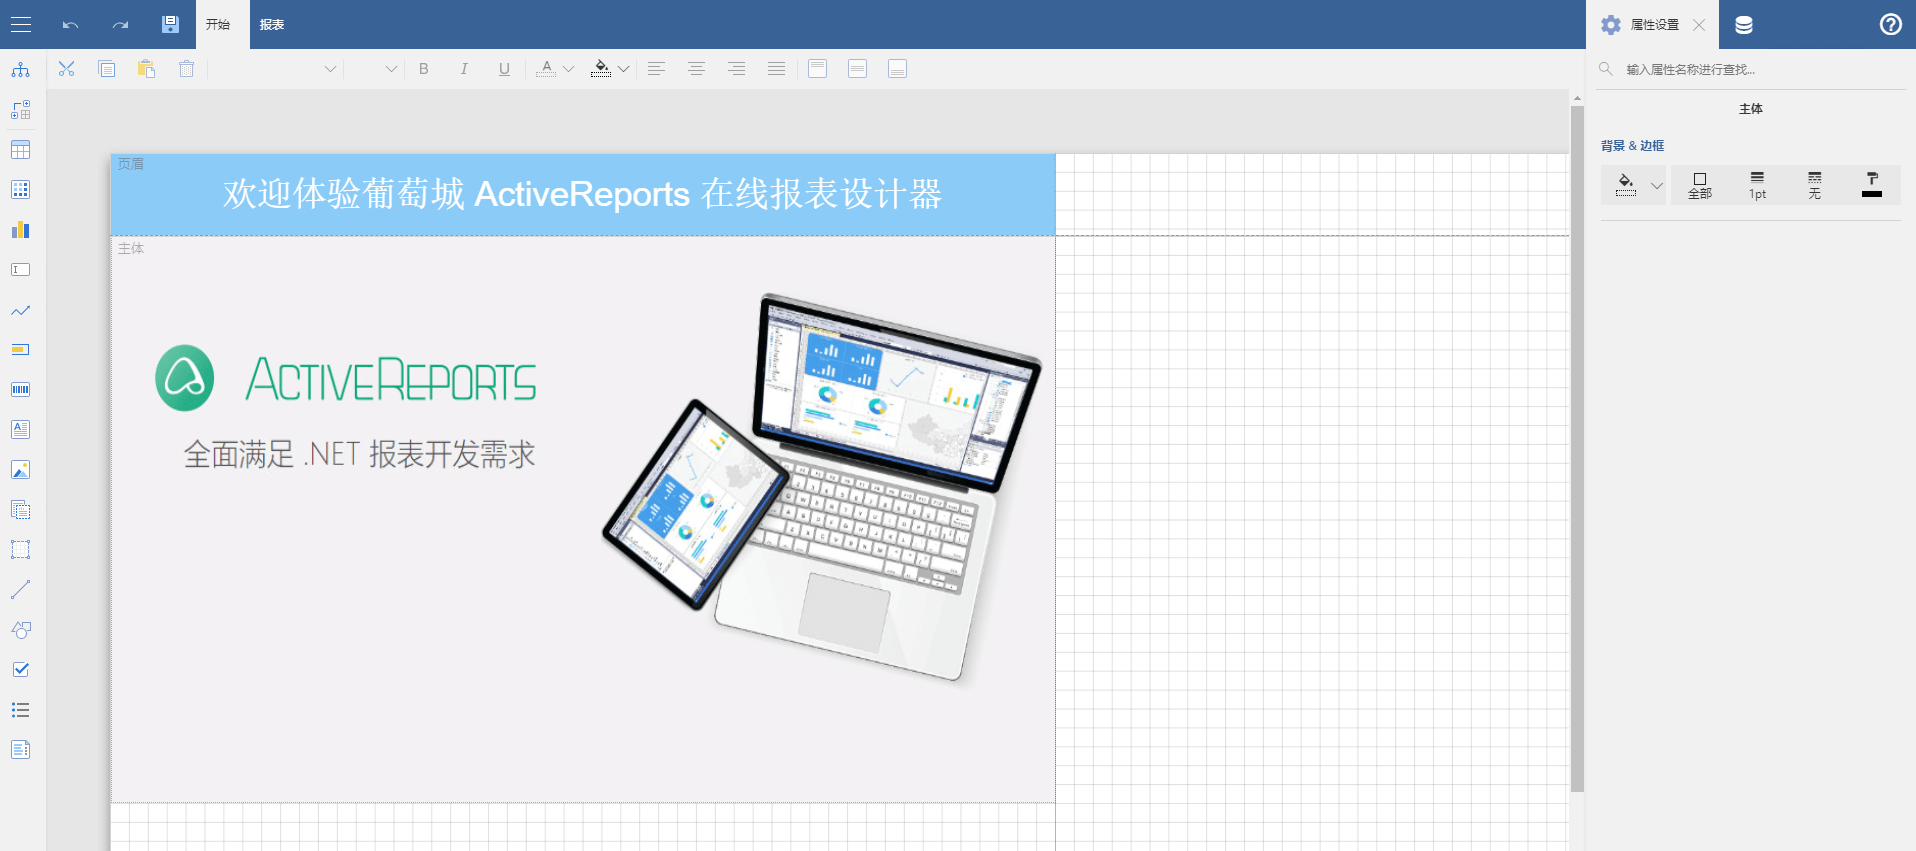
<script> var showElement = function (id) { if (!id) return; ($('#' + id)).css('display', 'block'); }; var hideElement = function (id) { if (!id) return; ($('#' + id)).css('display', 'none'); }; var designerId = 'designer-id'; var saveAsDialogId = 'save-as-dialog-id'; function onSaveAs(options) { showElement(saveAsDialogId); // render save-as dialog fileDialog.createSaveReportAsDialog(saveAsDialogId, { locale: options.locale, api: { getReportsList: function ( ) { return baseServerApi.getReportsList() .then(function (reportsList) { return reportsList.map(function (reportInfo) { return { path: reportInfo.Name }; }); }); }, saveReport: function (saveOptions) { return baseServerApi.saveNewReport({ name: saveOptions.path, content: options.reportInfo.content, }).then(function (saveResult) { return { id: saveResult.Id }; }); }, }, reportInfo: { path: options.reportInfo.name, }, onSuccess: function (saveResult) { hideElement(saveAsDialogId); options.onSuccess({ id: saveResult.id, name: saveResult.path }); }, onClose: function ( ) { hideElement(saveAsDialogId); }, }); }; // create designer options var designerOptions = GrapeCity.ActiveReports.WebDesigner.createDesignerOptions(baseServerApi); designerOptions.reportInfo.id = " MyReport.rdlx"; // enable showing save-as button designerOptions.saveAsButton.visible = true; // specify behavior on save-as designerOptions.onSaveAs = onSaveAs; // render designer application GrapeCity.ActiveReports.WebDesigner.renderApplication(designerId, designerOptions); </script> - 至此,一个简单的 ActiveReport 在线 表设计器已经创建成功,最终运行结果如下:
今天的内容就是这些,如你还有什么疑问可咨询客服!想要了解更多关于ActiveReports的信息,点这里!
标签:
声明:本站部分文章及图片源自用户投稿,如本站任何资料有侵权请您尽早请联系jinwei@zod.com.cn进行处理,非常感谢!