在本教程中,我们将使用HTML、CSS、jQuery和Kendo UI提供的一些组件来构建电商APP。在本教程中,我们将构建电子商务应用程序的基本版本。
在本教程中,我们将使用HTML、CSS、jQuery和Kendo UI提供的一些组件来构建电商APP。在本教程中,我们将构建电子商务应用程序的基本版本。
从头开始构建组件有时会非常耗时,为了方便的处理应用程序,我们将使用Kendo UI组件,这将节省大量时间。
Kendo UI是由Progress的Telerik团队开发的JavaScript库,它能帮助您快速构建Web应用程序的UI。Kendo UI的核心库提供了一系列易于使用的UI组件,例如 格、文本框、数字文本框、图表等,Kendo UI提供了流行的JavaScript库(如jQuery,Angular,React和Vue)的组件。
先决条件
要构建此应用程序,请使用以下一些工具:
- Kendo UI
- HTML/CSS
- jQuery

初始化应用程序
虽然开发功能齐全/可扩展的电子商务应用程序可能会很麻烦,但是实现基本版本很容易创建,我们将使用HTML/CSS, jQuery和Kendo UI创建一个应用。
创建一个名为marketplace的文件夹,并在其中定义此文件夹结构:
marketplace/
css/
styles.css
js/
items.js
functions.js
index.html
对于我们的应用程序,将使用一种非常简单的方法:
- 定义一个css文件夹来保存样式表。
- 定义一个保存jQuery函数的js和一个包含市场商品的item.js文件。
- 最后在文件夹的底部创建一个index.html文件,以用作应用程序的入口点。
首先准备index.html文件来接收和显示内容,在索引文件中,输入以下代码行:
<!-- ./index.html --><html><head><title>Awesome Market</title><link rel="stylesheet" href="css/styles.css"><link rel="stylesheet" href=" https://stackpath.bootstrapcdn.com/bootstrap/4.3.1/css/bootstrap.min.css"><link rel="stylesheet" href="https://use.fontawesome.com/releases/v5.7.2/css/all.css" integrity="sha384-fnmOCqbTlWIlj8LyTjo7mOUStjsKC4pOpQbqyi7RrhN7udi9RwhKkMHpvLbHG9Sr" crossorigin="anonymous"></head><body><main><header><nav class="navbar navbar-light bg-light justify-content-between"><a class="navbar-brand">MarketPlace</a><div id="cart-container"><div id="cart"><i class="fa fa-shopping-cart openCloseCart" style="margin-right: 10px;" aria-hidden="true">cart</i><i class="fas fa-trash-alt" id="emptyCart">Empty cart</i> </div><span id="itemCount"></span></div></nav></header><div id="shoppingCart"><div id="cartItemsContainer"><h2>Items in your cart</h2><i class="fa fa-times-circle-o fa-3x openCloseCart" aria-hidden="true"></i><div id="cartItems"></div><span id="cartTotal"></span></div></div><div id="products" class="row"> </div></main><script src="https://code.jquery.com/jquery-3.3.1.js"integrity="sha256-2Kok7MbOyxpgUVvAk/HJ2jigOSYS2auK4Pfzbm7uH60="crossorigin="anonymous"></script><script src="js/functions.js"></script></body></html>
- 通过CDN导入所有相关资源,资源包括jQuery、Bootstrap和fontawesome,以及自定义样式表。
- 定义将显示项目的区域。
- 标题包含当前购物车项目和一个用于清空图表的按钮。
- 定义div在每次查看时保存图表项。
- div为空,将自动从jQuery函数动态注入产品。
- 导入jQuery和自定义js文件
到目前为止,我们已经定义了一个样式表和一个包含空内容的函数文件,继续填充它们。
打开您的CSS文件并添加文件,并向其中添加以下代码:
// css/styles.cssmain {padding: 10px 0;width: 1024px;margin: 0 auto;}#cart-container {float: right;width: 210px;position: relative;}#itemCount {position: absolute;display: none;top: -10px;left: -10px;width: 20px;height: 20px;border-radius: 50%;background: red;color: white;text-align: center;}nav {margin-bottom: 30px;nav ul {list-style: none;overflow: auto;width: 100%;background: #444444;}nav ul li {float: left;padding: 5px 20px;}nav ul li a {color: #fff;text-decoration: none;}nav ul li:hover {color: #444444;background: #cccccc;}nav ul li:hover a {color: #444444;}img {width: 100%;}.item {width: 31%;float: left;margin: 1%;}.itemText p {margin-bottom: 20px;}.price-container {margin-top: 20px;}i:hover {cursor: pointer;}#shoppingCart {top: 0;left: 0;height: 100%;width: 100%;display: none;position: absolute;z-index: 9999;background: rgba(0, 0, 0, 0.6);}#cartItemsContainer {position: relative;width: 600px;left: 50%;top: 150px;margin-left: -300px;padding: 40px;box-shadow: 0 0 10px black;background: #e9e9e9;overflow: auto;}#cartItemsContainer i {position: absolute;top: 20px;right: 20px;}#cartItemsContainer .itemDetails {overflow: auto;width: 100%;margin-bottom: 40px;}#emptyCart {display: none;}#cartItemsContainer .itemImage {float: left;width: 260px;padding: 0 40px;}#cartItemsContainer .itemText {float: right;width: 260px;padding: 0 40px;}#cartItemsContainer .itemText .price-container {margin-top: 0;}.removeItem {margin-left: 40px;}.col-sm-4 {margin-bottom: 15px;}
现在,用产品填充items.js文件,向其添加以下代码:
// js/items.js[{"name": "Berries","price": 23.54,"image": "https://images.unsplash.com/photo-1488900128323-21503983a07exlib=rb-1.2.1&ixid=eyJhcHBfaWQiOjEyMDd9&auto=format&fit=crop&w=400&h=400&q=80","description": "Sweet popsicles to help with the heat"},{"name": "Orange","price": 10.33,"image": "https://images.unsplash.com/photo-1504185945330-7a3ca1380535xlib=rb-1.2.1&ixid=eyJhcHBfaWQiOjEyMDd9&auto=format&fit=crop&h=340&w=340&q=80","description": "Mouth watering burger. Who cares if it's healthy"},{"name": "Lemons","price": 12.13,"image": "https://images.unsplash.com/photo-1504382262782-5b4ece78642bxlib=rb-1.2.1&ixid=eyJhcHBfaWQiOjEyMDd9&auto=format&fit=crop&w=400&h=400&q=80","description": "Sumptuous egg sandwich"},{"name": "Bananas","price": 10.33,"image": "https://images.unsplash.com/photo-1478369402113-1fd53f17e8b4xlib=rb-1.2.1&ixid=eyJhcHBfaWQiOjEyMDd9&auto=format&fit=crop&w=400&h=400&q=80","description": "A great tower of pancakes. Dig in!"},{"name": "Apples","price": 10.33,"image": "https://images.unsplash.com/photo-1505253304499-671c55fb57fexlib=rb-1.2.1&ixid=eyJhcHBfaWQiOjEyMDd9&auto=format&fit=crop&w=400&h=400&q=80","description": "Great looking Waffle to start the day"},{"name": "Sharifa","price": 10.33,"image": "https://images.unsplash.com/photo-1470119693884-47d3a1d1f180xlib=rb-1.2.1&auto=format&fit=crop&w=400&h=400&q=80","description": "What's greater than 5 minutes with grilled corn"}]
现在打开您的functions.js文件,并向其中添加以下代码:
// js/functions.jsfunction init(){// read our array of products and display it$.getJSON( "js/items.js", function( json ) {json.forEach(function (item) {$("#products").append('<div class="col-sm-4"><div class="card">' +'<img class="card-img-top" src="' + item.image + '">' +'<div class="card-body">' +'<h5 class="card-title">' + item.name + '</h5>' +'<p class="card-text price">' + "Price: $" + item.price + '</p>' +'<p class="card-text price">' + item.description + '</p>' +'<a href="#" id="showPopupNotification" class="add btn btn-primary">Add to cart</a>' +'</div>' +'</div></div>');});});}$(init);
使用jQuery:
- 从items.js文件中读取内容
- 构建产品DOM元素
- 附加并显示在index.html文件中
现在,当您尝试加载index.html时,将看到一个空白屏幕。 那是因为浏览器由于访问控制源而无法读取JSON文件。为了解决这个问题,需要使用http服务器来加载文件。
首先通过在终端中输入以下命令来安装http-server:
npm install -g http-server
安装后,您就可以在系统中的任何地方使用http服务器,现在在终端中输入以下内容来提供文件:
http-server -c-1
现在,当您在浏览器中访问http:// localhost:8080时,您将看到以下内容:
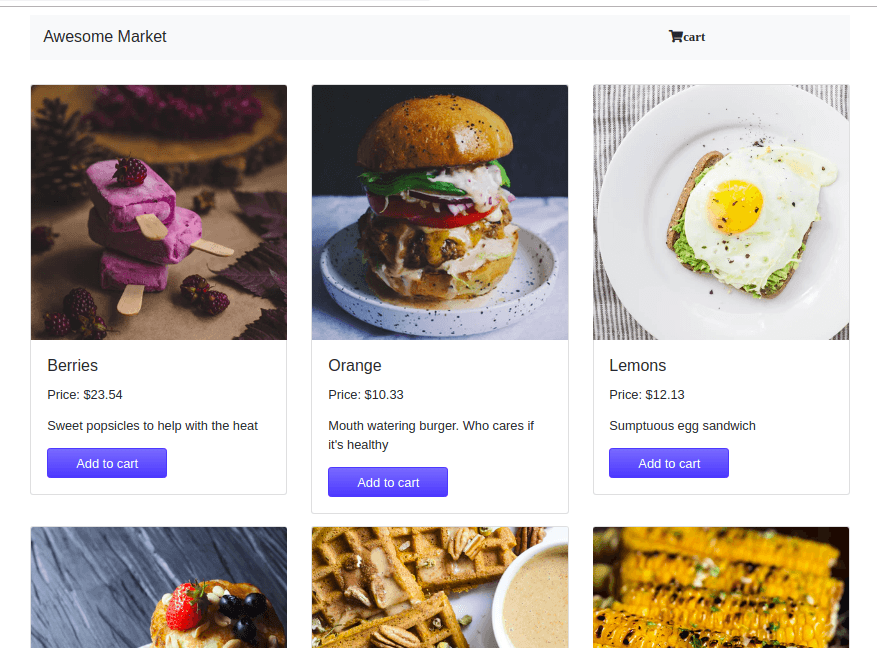
这意味着已经能够阅读和显示产品及其信息,接下来,我们需要编写函数来处理从购物车中添加和删除商品的操作。
打开functions.js并添加以下代码:
// js/functions.jsfunction init(){var itemCount = 0;var priceTotal = 0;// other code stays same// Add Item to Cart$('.add').click(function (){itemCount ++;$('#itemCount').text(itemCount).css('display', 'block');$(this).siblings().clone().appendTo('#cartItems').append('<button class="removeItem">Remove Item</button>');// Calculate Total Pricevar price = parseInt($(this).siblings().find('.price').text());priceTotal += price;$('#cartTotal').text("Total: $" + priceTotal);});// Hide and Show Cart Items$('.openCloseCart').click(function(){$('#shoppingCart').toggle();});// Empty Cart$('#emptyCart').click(function() {itemCount = 0;priceTotal = 0;$('#itemCount').css('display', 'none');$('#cartItems').text('');$('#cartTotal').text("Total: $" + priceTotal);});// Remove Item From Cart$('#shoppingCart').on('click', '.removeItem', function(){$(this).parent().remove();itemCount --;$('#itemCount').text(itemCount);// Remove Cost of Deleted Item from Total Pricevar price = parseInt($(this).siblings().find('.price').text());priceTotal -= price;$('#cartTotal').text("Total: €" + priceTotal);if (itemCount == 0) {$('#itemCount').css('display', 'none');}});}$(init);
在这里,我们定义了应用程序所需的功能。
- 使用Click方法,我们将特定元素作为目标,并根据所单击的按钮来更新它们的状态
- 当用户添加、删除、清空或查看当前购物车时,状态会更改
- 最后,一旦文件加载到索引页上,我们就使用jQuery的$调用init函数来初始化文件
至此,我们有了一个电子商务应用程序的工作版本,通过Kendo UI添加另一项功能。
使用Kendo UI添加空购物车按钮
您可能已经注意到,当加载页面时,没有显示空购物车。 这是因为我们最初将其设置为从CSS根本不显示。 在本节中我们将:
- 使用Kendo UI按钮组件显示和设置按钮样式
- 仅在购物车中至少有一件商品后才显示按钮
我们需要先将Kendo UI导入到项目中,然后才能访问按钮组件。
打开index.html文件,并向其中添加以下代码行:
// ./index.html<head>//import kendoui through the cdn in your header<link rel="stylesheet" href="https://kendo.cdn.telerik.com/2019.1.220/styles/kendo.common.min.css"><link rel="stylesheet" href="https://kendo.cdn.telerik.com/2019.1.220/styles/kendo.rtl.min.css"><link rel="stylesheet" href="https://kendo.cdn.telerik.com/2019.1.220/styles/kendo.default.min.css"><link rel="stylesheet" href="https://kendo.cdn.telerik.com/2019.1.220/styles/kendo.mobile.all.min.css"><script src="https://kendo.cdn.telerik.com/2019.1.220/js/kendo.all.min.js"> </script></head>
在此文件中,我们仅通过CDN导入Kendo UI。
现在在js文件中初始化函数,打开functions.js文件,并将以下代码添加到其中:
// js/functions.js// add inside init function$("#emptyCart").kendoButton();//insert code in bold into this function$(document).on("click", ".add", function (){// new code$('#emptyCart').css('display', 'inline');//other code stays same
这里我们做两件事:
- 初始化按钮
- 使用jQuery显示按钮
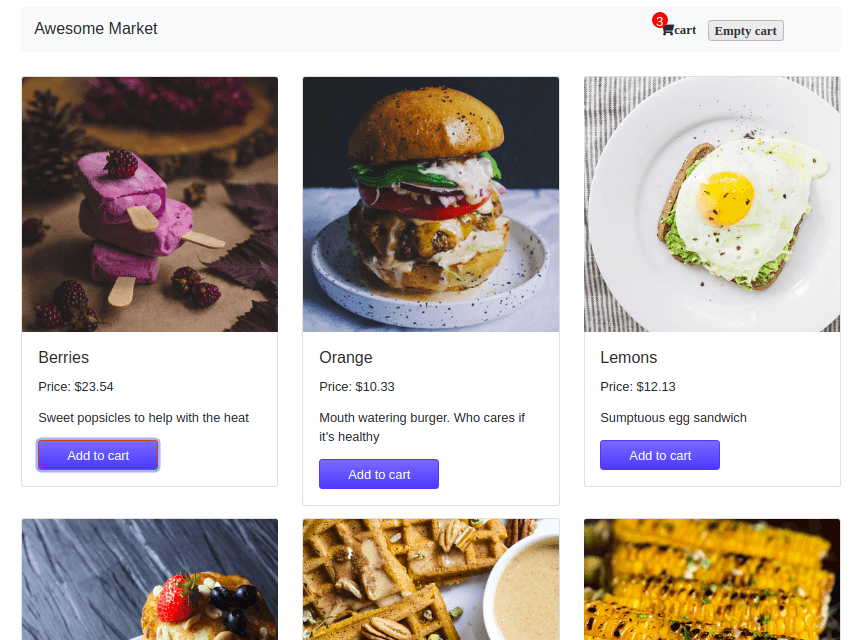
现在,重新启动服务器,并在浏览器中访问http:// localhost:8080。 将商品添加到购物车后,您将看到按钮显示。


标签:
声明:本站部分文章及图片源自用户投稿,如本站任何资料有侵权请您尽早请联系jinwei@zod.com.cn进行处理,非常感谢!