在前文中我们展示了如何在Visual Studio中针对Windows和嵌入式Linux创建多平台Qt Quick应用程序项目。现在,我们将展示如何在嵌入式设备上运行该应用程序。然后,我们将继续将该项目开发为我们打算创建的完整嵌入式应用程序。最后,我们将使用VS调试器对应用程序的C ++和QML代码进行远程调试。
Qt是一个跨平台框架,通常用作图形工具包,它不仅创建CLI应用程序中非常有用。而且它也可以在三种主要的台式机操作系统以及移动操作系统(如Symbian,Nokia Belle,Meego Harmattan,MeeGo或BB10)以及嵌入式设备,Android(Necessitas)和iOS的端口上运行。现在我们为你提供了免费的试用版。赶快点击下载Qt最新试用版吧>>
点击获取更多文章教程
【Qtitan组件集】
- QtitanRibbon| 下载试用: 遵循Microsoft Ribbon UI Paradigm for Qt技术的Ribbon UI组件,致力于为Windows、Linux和Mac OS X提供功能完整的Ribbon组件。
- QtitanChart | 下载试用 : 是一个C ++库,代表一组控件,这些控件使您可以快速地为应用程序提供漂亮而丰富的图表。并且支持所有主要的桌面操作系统。
- QtitanDataGrid| 下载试用 : 适用于Qt的商业化DataGrid 组件,使得表格数据可以直接面向终端用户完全集成了QtDesigner,极易适应其他相似开发环境,保证100%兼容Qt GUI。
在嵌入式设备上运行
我们已经展示了如何交叉编译在Visual Studio中创建的“ hello world” Qt Quick应用程序。现在,我们将看到如何在Raspberry Pi上运行该应用程序。由于我们将以全屏模式运行,因此我们必须首先向应用程序窗口中添加一些内容。
Window { visible: true title: qsTr("Hello World") Text { id: clock font.pointSize: 72 Timer { interval: 1000; running: true; repeat: true onTriggered: clock.text = (new Date).toLocaleTimeString(Qt.locale("de_DE"), "hh:mm:ss"); } }}
和以前一样,选择Linux项目配置,然后按F7键开始交叉编译。
1>------ Build started: Project: QuickMirror, Configuration: Debug_RPi x64 ------1>rcc qml.qrc1>Invoking 'mkdir -p $(dirname qml.qrc); mkdir -p $(dirname /mnt/c/Users/user/Source/Repos/QuickMirror/main.qml); mkdir -p $(dirname /mnt/c/Users/user/Source/Repos/QuickMirror/obj/x64/Debug_RPi/rcc/qrc_qml.cpp); (/home/user/raspi/qt5/bin/rcc /mnt/c/Users/user/Source/Repos/QuickMirror/qml.qrc --name qml -o /mnt/c/Users/user/Source/Repos/QuickMirror/obj/x64/Debug_RPi/rcc/qrc_qml.cpp)', working directory: '/mnt/c/Users/user/Source/Repos/QuickMirror'1>Starting remote build1>Compiling sources:1>qrc_qml.cpp1>Linking objects1>QuickMirror.vcxproj -> C:UsersuserSourceReposQuickMirrorbinx64Debug_RPiQuickMirror.out========== Build: 1 succeeded, 0 failed, 0 up-to-date, 0 skipped ==========
要在每次构建结束时自动复制应用程序文件,可以在“ WSL构建后事件”属性页中设置以下命令(ATTN: 这将以明文形式保存设备密码)。
C:Usersuser> scp C:UsersuserSourceReposQuickMirrorbinx64Debug_RPiQuickMirror.out pi@192.168.1.98:/home/pi/pi@192.168.1.98's password:QuickMirror.out 100% 465KB 1.6MB/s 00:00C:Usersuser>
在启动Qt Quick应用程序之前,我们需要设置一些必需的环境变量:
-
LD_LIBRARY_PATH
Qt二进制文件安装目录的路径。 -
QT_QPA_PLATFORM
平台插件。 -
QT_QPA_PLATFORM_PLUGIN_PATH
平台插件安装目录的路径。 -
QT_QPA_EGLFS_PHYSICAL_WIDTH
QT_QPA_EGLFS_PHYSICAL_HEIGHT
物理屏幕的宽度和高度,以毫米为单位。 -
QML2_IMPORT_PATH
安装的QML模块的路径。
pi@raspberry-pi:~$ export LD_LIBRARY_PATH="/usr/local/qt5pi/lib"pi@raspberry-pi:~$ export QT_QPA_PLATFORM="eglfs"pi@raspberry-pi:~$ export QT_QPA_PLATFORM_PLUGIN_PATH="/usr/local/qt5pi/plugins/platforms"pi@raspberry-pi:~$ export QT_QPA_EGLFS_PHYSICAL_WIDTH="326"pi@raspberry-pi:~$ export QT_QPA_EGLFS_PHYSICAL_HEIGHT="520"pi@raspberry-pi:~$ export QML2_IMPORT_PATH="/usr/local/qt5pi/qml"pi@raspberry-pi:~$ ./QuickMirror.out
树莓派显示器

在Raspberry Pi中运行“ Hello World”应用程序
开发应用程序
我们的应用程序的要求包括显示以下信息:
- 当前时间
- 当前日期
- 周年纪念
- 天气预
- 下次出发的公共交通工具
- 新闻
我们将把每个项目封装为专用的QML类型。为此,我们必须首先将QML模块定义(qmldir)文件添加到项目中:
- 选择“项目>添加新项。。> Qt> QML模块定义”。
- 在位置字段中,指示将包含QML文件的文件夹的路径。
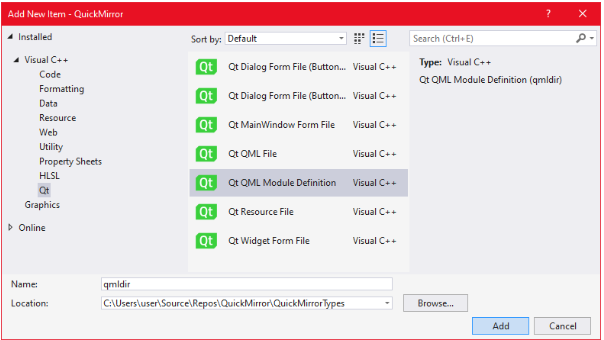
向项目添加新的QML模块定义
按下“添加”后,qmldir 文件将在项目树中可用。我们将使用此文件来定义每种QML类型到其对应源文件的映射。
ApiCall 1.0 QuickMirror.ApiCall.qmlCalendar 1.0 QuickMirror.Calendar.qmlClock 1.0 QuickMirror.Clock.qmlNewsTicker 1.0 QuickMirror.NewsTicker.qmlOnThisDay 1.0 QuickMirror.OnThisDay.qmlPublicTransport 1.0 QuickMirror.PublicTransport.qmlWeather 1.0 QuickMirror.Weather.qml
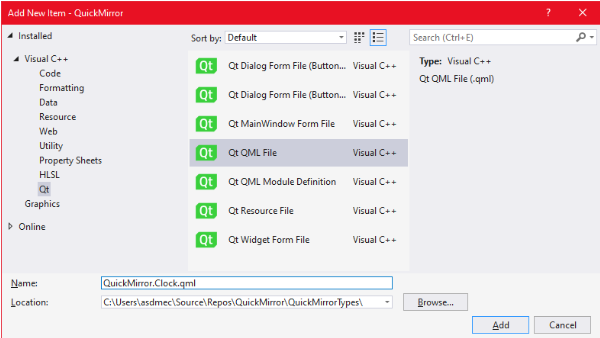
要将新的QML源文件添加到项目中:
- 选择“项目>添加新项…> Qt> QML文件”。
- 将位置设置qmldir为创建文件的相同目录。
- 设置QML文件名。
- 按“添加”。
我们将首先添加QML类型以显示当前时间,当前日期和重要的周年纪念日。该Clock类型将显示当前时间,每秒刷新一次。
QuickMirror.Clock.qml
function refresh() { text = (new Date).toLocaleTimeString(Qt.locale("de_DE"), "hh:mm"); } Component.onCompleted : refresh(); Timer { interval: 1000; running: true; repeat: true onTriggered: parent.refresh(); }}
该Calendar类型将显示当前日期,并在不同语言环境之间循环。
QuickMirror.Calendar.qml
Text { renderType: Text.NativeRendering id: calendar color: "white" font.family: FontFamily_Bold font.styleName: FontStyle_Bold font.pointSize: 72 property var locales: ["en_US", "de_DE", "pt_PT"] property var localeIdx: 0 function capitalize(s) { return s.replace(/(-)./g, function(c) { return c.toUpperCase(); }); } function setNextLocale() { localeIdx = (localeIdx + 1) % locales.length; } function getCurrentText() { var date = new Date; var locale = Qt.locale(locales[localeIdx]); var calendarText = capitalize(date.toLocaleDateString(locale, "dddd, dd")); var monthShort = date.toLocaleDateString(locale, "MMM"); var monthLong = date.toLocaleDateString(locale, "MMMM"); if (monthLong.length <= 5) { calendarText += capitalize(monthLong); } else { calendarText += capitalize(monthShort); if (!monthShort.endsWith(".")) calendarText += "."; } calendarText += date.toLocaleDateString(locale, " yyyy"); return calendarText; } Component.onCompleted: { text = getCurrentText(); } Timer { interval: 15000; running: true; repeat: true onTriggered: { setNextLocale(); text = getCurrentText(); } } Behavior on text { SequentialAnimation { NumberAnimation { target: calendar; property: "opacity"; to: 0.0; duration: 1000 } PropertyAction { target: calendar; property: "text" } NumberAnimation { target: calendar; property: "opacity"; to: 1.0; duration: 500 } } } }
除了日期/时间,我们的应用程序还将依靠Web API来检索信息。我们将curl在一个单独的过程中运行以连接到Web API。流程创建将由名为的C ++类处理Process。然后,QML类型ApiCall将使用一个Process对象以curl必要的参数开始并收集其输出。
QuickMirror.ApiCall.qml
Item {    property var url: ""    property var path: []    property var query: []    signal response(var response)    signal error(var error)    Process {        id: curl        property var path: Q_OS_WIN "C:\Windows\System32\curl.exe" : "/usr/bin/curl"        property var request: ""        command: path + " -s "" + request + """"""    }    function sendRequest() {        curl.request = url;        if (path.length > 0)            curl.request += ""/"" + path.join(""/"");         if (query.length > 0)            curl.request += "" + query.join(""&"");        curl.start();    }    Connections {        target: curl        onExit /*(int exitCode


声明:本站部分文章及图片源自用户投稿,如本站任何资料有侵权请您尽早请联系jinwei@zod.com.cn进行处理,非常感谢!