自己做了一把10g升级11g实验.以下是实验过程.我的环境如下:
操作系统:Oracle Enterprise Linux 5.4 数据库:10.2.0.5 SID:db10g Archive Mode:No Archived
1.安装11g软件前的设置.
在安装11g软件的时候需要把软件包,内核参数都修成11g需求的.按照官方文档调整下列参数.
修改内核参数/etc/sysctl.conf
kernel.shmmni = 4096
kernel.sem = 250 32000 100 128
net.ipv4.ip_local_port_range = 9000 65500
net.core.rmem_default=1048576
net.core.rmem_max= 4194304
net.core.wmem_default=262144
net.core.wmem_max= 1048586
fs.file-max = 6851744
fs.suid_dumpable = 1
fs.aio-max-nr = 1048576
在/etc/security/limits.conf下增加
oracle soft nproc 2047
oracle hard nproc 16384
oracle soft nofile 4096
oracle hard nofile 65536
oracle soft stack 10240
安装下列软件包
rpm -Uvh binutils-2.*
rpm -Uvh compat-libstdc++-33*
rpm -Uvh compat-libstdc++-33*.i386.rpm
rpm -Uvh elfutils-libelf*
rpm -Uvh gcc-4.*
rpm -Uvh gcc-c++-4.*
rpm -Uvh glibc-2.*
rpm -Uvh glibc-common-2.*
rpm -Uvh glibc-devel-2.*
rpm -Uvh glibc-headers-2.*
rpm -Uvh ksh*
rpm -Uvh libaio-0.*
rpm -Uvh libaio-devel-0.*
rpm -Uvh libgomp-4.*
rpm -Uvh libgcc-4.*
rpm -Uvh libstdc++-4.*
rpm -Uvh libstdc++-devel-4.*
rpm -Uvh make-3.*
rpm -Uvh sysstat-7.*
rpm -Uvh unixODBC-2.*
rpm -Uvh unixODBC-devel-2.*
rpm -Uvh numactl-devel-*
给Oracle用户添加组
[root@db10g Server]# id oracle
uid=500(oracle) gid=501(oinstall) groups=501(oinstall),502(dba)
[root@db10g Server]# groupadd oper
[root@db10g Server]# groupadd asmadmin
[root@db10g Server]# usermod -g oinstall -G dba,oper,asmadmin oracle
[root@db10g Server]# id oracle
uid=500(oracle) gid=501(oinstall) groups=501(oinstall),502(dba),503(oper),504(asmadmin)
增加11g安装目录和环境变量
[oracle@db10g db_1]$ mkdir -p /oracle/app/oracle/product/11.2.0/db_1
[oracle@db10g ~]$ cp .bash_profile .11bash_profile
[oracle@db10g ~]$ vi .11bash_profile
# Oracle Settings
TMP=/tmp; export TMP
TMPDIR=$TMP; export TMPDIR
ORACLE_BASE=/oracle/app/oracle; export ORACLE_BASE
ORACLE_HOME=$ORACLE_BASE/product/11.2.0/db_1; export ORACLE_HOME
ORACLE_SID=db10g; export ORACLE_SID
PATH=/usr/sbin:$PATH; export PATH
PATH=$ORACLE_HOME/bin:$PATH; export PATH
LD_LIBRARY_PATH=$ORACLE_HOME/lib:/lib:/usr/lib; export LD_LIBRARY_PATH
CLASSPATH=$ORACLE_HOME/jlib:$ORACLE_HOME/rdbms/jlib; export CLASSPATH
2.开始安装11g.
安装的时候先source .11bash_profile,安装过程中前面都一样的,在这个地方记得选择Upgrade an existing database
[root@db10g oracle]# /oracle/app/oracle/product/11.2.0/db_1/root.sh
Performing root user operation for Oracle 11g
The following environment variables are set as:
ORACLE_OWNER= oracle
ORACLE_HOME= /oracle/app/oracle/product/11.2.0/db_1
Enter the full pathname of the local bin directory: [/usr/local/bin]:
The file “dbhome” already exists in /usr/local/bin. Overwrite it(y/n)
[n]: y
Copying dbhome to /usr/local/bin …
The file “oraenv” already exists in /usr/local/bin. Overwrite it(y/n)
[n]: y
Copying oraenv to /usr/local/bin …
The file “coraenv” already exists in /usr/local/bin. Overwrite it(y/n)
[n]: y
Copying coraenv to /usr/local/bin …
Entries will be added to the /etc/oratab file as needed by
Database Configuration Assistant when a database is created
Finished running generic part of root script.
Now product-specific root actions will be performed.
Finished product-specific root actions.
3.运行完root.sh后会出现2个配置助手,一个是监听,另外一个是dbua
这里还可以配置tns连接串
因为是做实验,实验环境的硬盘设置有限,所以这里我没有开backup database.如果是生产环境的话,建议打开,进行备份.如果你的库开了归档的话,上面界面会多一个选项,在线期间关闭归档功能,这个功能最好勾上.
这里 临时表空间不足,我们增加一下再回来点retry就好.
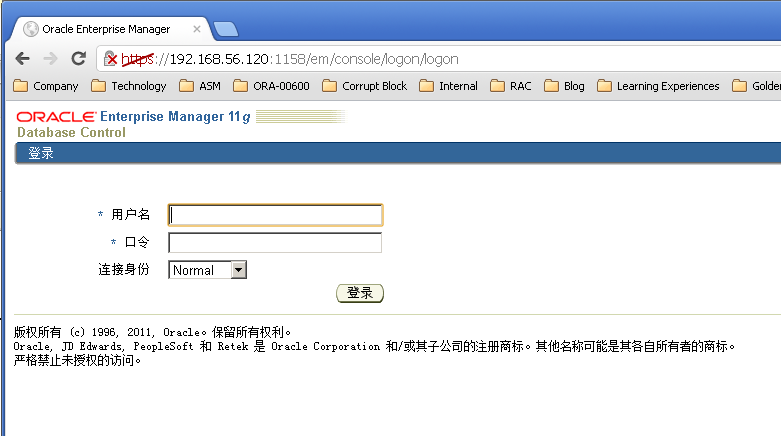
EM也是可以访问的.

4.升级完成之后,我们可以做进一步的检查
首先我们把环境变量彻底的修改成11g的.
[oracle@db10g ~]$ mv .11bash_profile .bash_profile
[oracle@db10g ~]$
[oracle@db10g ~]$ source .bash_profile
[oracle@db10g ~]$
[oracle@db10g ~]$ echo $ORACLE_HOME
/oracle/app/oracle/product/11.2.0/db_1
[oracle@db10g ~]$ sqlplus / as sysdba
SQL*Plus: Release 11.2.0.3.0 Production on Tue May 29 14:41:16 2012
Copyright (c) 1982, 2011, Oracle. All rights reserved.
Connected to:
Oracle Database 11g Enterprise Edition Release 11.2.0.3.0 – 64bit Production
With the Partitioning, OLAP, Data Mining and Real Application Testing options
SQL> select * from v$version;
BANNER
——————————————————————————–
Oracle Database 11g Enterprise Edition Release 11.2.0.3.0 – 64bit Production
PL/SQL Release 11.2.0.3.0 – Production
CORE 11.2.0.3.0 Production
TNS for Linux: Version 11.2.0.3.0 – Production
NLSRTL Version 11.2.0.3.0 – Production
SQL> select COMP_NAME,VERSION,STATUS from DBA_REGISTRY;
COMP_NAME VERSION STATUS
—————————————- —————————— ——-
Oracle Enterprise Manager 11.2.0.3.0 VALID
OLAP Catalog 11.2.0.3.0 VALID
Spatial 11.2.0.3.0 VALID
Oracle Multimedia 11.2.0.3.0 VALID
Oracle XML Database 11.2.0.3.0 VALID
Oracle Text 11.2.0.3.0 VALID
Oracle Data Mining 11.2.0.3.0 VALID
Oracle Expression Filter 11.2.0.3.0 VALID
Oracle Rules Manager 11.2.0.3.0 VALID
Oracle Workspace Manager 11.2.0.3.0 VALID
Oracle Database Catalog Views 11.2.0.3.0 VALID
Oracle Database Packages and Types 11.2.0.3.0 VALID
JServer JAVA Virtual Machine 11.2.0.3.0 VALID
Oracle XDK 11.2.0.3.0 VALID
Oracle Database Java Packages 11.2.0.3.0 VALID
OLAP Analytic Workspace 11.2.0.3.0 VALID
Oracle OLAP API 11.2.0.3.0 VALID
17 rows selected.
至此,整个升级过程完成!
分享到:
更多
相关资源:橘子快速启动软件(橘子启动器)v3.0绿色免费版-其它代码类资源…
声明:本站部分文章及图片源自用户投稿,如本站任何资料有侵权请您尽早请联系jinwei@zod.com.cn进行处理,非常感谢!