一、安装依赖库以及模型
安装PaddlePaddle
安装PaddleHub
导入人体骨骼关键节点检测模型
二、测试及拼接皮影素材
打开pycharm软件,需安装以下依赖库:cv2 4.5.1.48、matplotlib 3.0.3、numpy
1.16.2、tensorflow 2.4.1等。
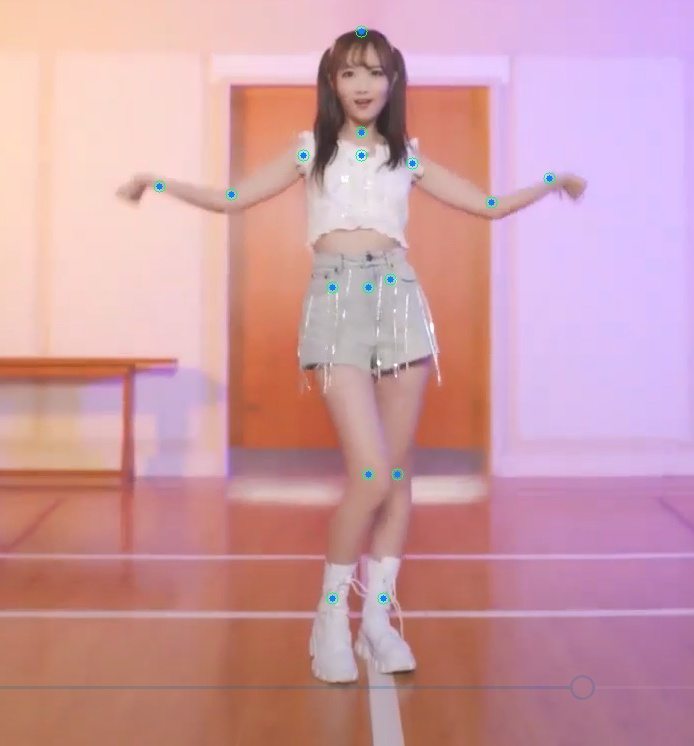
测试人体骨骼关键点检测模型是否安装成功。
①代码如下:
②打开output_pose文件夹会发现多出一张图片为检测图片骨骼节点图,若安装成功的话,结果如下图所示:

拼接皮影素材
代码如下:
import osimport cv2import paddlehub as hubimport matplotlib.pyplot as pltfrom matplotlib.image import imreadimport numpy as npdef show_img(img_path, size=8):    '''文件读取图片显示    '''    im = imread(img_path)    plt.figure(figsize=(size, size))    plt.axis("off")    plt.imshow(im)def img_show_bgr(image, size=8):    '''cv读取的图片显示    '''    image = cv2.cvtColor(image, cv2.COLOR_BGR2RGB)    plt.figure(figsize=(size, size))    plt.imshow(image)    plt.axis("off")    plt.show()show_img('imgs/01.jpg')def get_true_angel(value):    '''    转转得到角度值    '''    return value / np.pi * 180def get_angle(x1, y1, x2, y2):    '''    计算旋转角度    '''    global the_angle    dx = abs(x1 - x2)    dy = abs(y1 - y2)    result_angele = 0    if x1 == x2:if y1 > y2:    result_angele = 180    else:if y1 != y2:    the_angle = int(get_true_angel(np.arctan(dx / dy)))if x1  x2:    if y1 > y2: result_angele = -(180 - the_angle)    elif y1  y2: result_angele = -the_angle    elif y1 == y2: result_angele = -90elif x1 > x2:    if y1 > y2: result_angele = 180 - the_angle    elif y1  y2: result_angele = the_angle    elif y1 == y2: result_angele = 90    if result_angele  0:result_angele = 360 + result_angele    return result_angeledef rotate_bound(image, angle, key_point_y):    '''    旋转图像,并取得关节点偏移量    '''    # 获取图像的尺寸    (h, w) = image.shape[:2]    # 旋转中心    (cx, cy) = (w / 2, h / 2)    # 关键点必须在中心的y轴上    (kx, ky) = cx, key_point_y    d = abs(ky - cy)    # 设置旋转矩阵    M = cv2.getRotationMatrix2D((cx, cy), -angle, 1.0)    cos = np.abs(M[0, 0])    sin = np.abs(M[0, 1])    # 计算图像旋转后的新边界    nW = int((h * sin) + (w * cos))    nH = int((h * cos) + (w * sin))    # 计算旋转后的相对位移    move_x = nW / 2 + np.sin(angle / 180 * np.pi) * d    move_y = nH / 2 - np.cos(angle / 180 * np.pi) * d    # 调整旋转矩阵的移动距离(t_{x}, t_{y})    M[0, 2] += (nW / 2) - cx    M[1, 2] += (nH / 2) - cy    return cv2.warpAffine(image, M, (nW, nH)), int(move_x), int(move_y)def get_distences(x1, y1, x2, y2):    return ((x1 - x2) ** 2 + (y1 - y2) ** 2) ** 0.5def append_img_by_sk_points(img, append_img_path, key_point_y, first_point, second_point, append_img_reset_width=None,     append_img_max_height_rate=1, middle_flip=False, append_img_max_height=None):    '''    将需要添加的肢体图片进行缩放    '''    append_image = cv2.imdecode(np.fromfile(append_img_path, dtype=np.uint8), cv2.IMREAD_UNCHANGED)    # 根据长度进行缩放    sk_height = int(get_distences(first_point[0], first_point[1], second_point[0], second_point[1]) * append_img_max_height_rate)    # 缩放制约    if append_img_max_height:sk_height = min(sk_height, append_img_max_height)    sk_width = int(sk_height / append_image.shape[0] * append_image.shape[1]) if append_img_reset_width is None else int(append_img_reset_width)    if sk_width  0:sk_width = 1    if sk_height  0:sk_height = 1    # 关键点映射    key_point_y_new = int(key_point_y / append_image.shape[0] * append_image.shape[1])    # 缩放图片    append_image = cv2.resize(append_image, (sk_width, sk_height))    img_height, img_width, _ = img.shape    # 是否根据骨骼节点位置在 图像中间的左右来控制是否进行 左右翻转图片    # 主要处理头部的翻转, 默认头部是朝左    if middle_flip:middle_x = int(img_width / 2)if first_point[0]  middle_x and second_point[0]  middle_x:    append_image = cv2.flip(append_image, 1)    # 旋转角度    angle = get_angle(first_point[0], first_point[1], second_point[0], second_point[1])    append_image, move_x, move_y = rotate_bound(append_image, angle=angle, key_point_y=key_point_y_new)    app_img_height, app_img_width, _ = append_image.shape    zero_x = first_point[0] - move_x    zero_y = first_point[1] - move_y    (b, g, r) = cv2.split(append_image)    for i in range(0, r.shape[0]):for j in range(0, r.shape[1]):    if 230 > r[i][j] > 200 and 0  zero_y + i  img_height and 0  zero_x + j  img_width: img[zero_y + i][zero_x + j] = append_image[i][j]    return imgbody_img_path_map = {    "right_hip": "shadow_play_material/right_hip.jpg",    "right_knee": "shadow_play_material/right_knee.jpg",    "left_hip": "shadow_play_material/left_hip.jpg",    "left_knee": "shadow_play_material/left_knee.jpg",    "left_elbow": "shadow_play_material/left_elbow.jpg",    "left_wrist": "shadow_play_material/left_wrist.jpg",    "right_elbow": "shadow_play_material/right_elbow.jpg",    "right_wrist": "shadow_play_material/right_wrist.jpg",    "head": "shadow_play_material/head.jpg",    "body": "shadow_play_material/body.jpg"}pose_estimation = hub.Module(name="human_pose_estimation_resnet50_mpii")def get_combine_img(img_path, pose_estimation=pose_estimation, body_img_path_map=body_img_path_map,backgroup_img_path='background.jpg'):    '''    识别图片中的关节点,并将皮影的肢体进行对应,最后与原图像拼接后输出    '''    result = pose_estimation.keypoint_detection(paths=[img_path])    image = cv2.imread(img_path)    # 背景图片    backgroup_image = cv2.imread(backgroup_img_path)    image_flag = cv2.resize(backgroup_image, (image.shape[1], image.shape[0]))    # 最小宽度    min_width = int(get_distences(result[0]['data']['head_top'][0], result[0]['data']['head_top'][1],    result[0]['data']['upper_neck'][0], result[0]['data']['upper_neck'][1]) / 3)    # 右大腿    append_img_reset_width = max(int(get_distences(result[0]['data']['pelvis'][0], result[0]['data']['pelvis'][1], result[0]['data']['left_hip'][0], result[0]['data']['right_hip'][1]) * 1.6), min_width)    image_flag = append_img_by_sk_points(image_flag, body_img_p

                                                        声明:本站部分文章及图片源自用户投稿,如本站任何资料有侵权请您尽早请联系jinwei@zod.com.cn进行处理,非常感谢!